
Why Does My Toilet Rock? Causes & Fixes

Why Does My Rental Toilet Rock Side to Side?
Read full question
During a routine walkthrough of one of my units, I noticed the toilet in the main bathroom shifts noticeably side to side when you sit on it. According to what I've read, a toilet should be perfectly stable at the base — but this one moves what feels like almost half an inch in each direction, which seems way more than a minor wobble. I measured the gap under one side of the base and it looks like about 3/16 of an inch on the left side and almost nothing on the right, so the numbers just don't match what I'd expect from a properly set toilet.
I've had the unit occupied for a while and the tenant mentioned it started recently rather than being an ongoing thing. I want to figure out whether this is something I can send my handyman out to handle or whether it needs a licensed plumber — and more importantly, whether ignoring it risks damage to the floor or the wax ring seal underneath.
Quick Answer
A rocking toilet is almost always caused by loose closet (flange) bolts, missing or deteriorated floor shims, or an uneven floor surface — and occasionally a damaged flange underneath. Tightening the bolts and re-shimming the base is a straightforward DIY or handyman task, but if the toilet has been rocking for a while, the wax ring seal may already be compromised and the flange should be inspected before reseating.
What's Actually Causing the Movement
A toilet that rocks side to side is almost never a mystery — there are three common culprits, and they're worth checking in order before anyone touches a wrench. The movement itself isn't the real danger; the danger is what the movement does over time to the wax ring seal and the flange beneath the toilet. Every time the toilet shifts, it works the wax ring, which can eventually break the seal and lead to leaks and subfloor damage. A badly compromised seal can also allow sewer gas into the bathroom — another reason to address movement promptly rather than ignore it.
The three usual suspects are: loose closet bolts (the pair of bolts that anchor the toilet base to the floor flange), missing or deteriorated plastic shims under the base, and an uneven or slightly sloped floor. A damaged or broken flange is less common but more serious. Start with the simplest possibility and work down the list.
What a Handyman or Confident DIYer Can Handle
Step 1 — Check and Snug the Closet Bolts
The closet bolts (sometimes called Johnny bolts) run up through slots in the floor flange and are held in place by plastic washers and nuts beneath the decorative caps at the base of the toilet. Pry off the plastic caps with a flathead screwdriver and check whether the nuts are loose. If they spin freely, that's almost certainly your problem.
Tighten each nut by hand first, then snug it with an adjustable wrench — just snug, then a small amount further — stop the moment you feel firm resistance. The goal is feel, not a specific number of turns; porcelain cracks easily from overtightening. Do not overtighten. The toilet base is porcelain, and cranking down too hard will crack it. If a nut spins without tightening (meaning the bolt itself is spinning in the flange slot), you'll need to hold the bolt head still with pliers while you turn the nut. If the bolt is corroded and won't cooperate, replace the bolt set — they're inexpensive and widely available — bring the old bolt or check your flange type before buying, as sizing can vary slightly between older and newer installations.
Step 2 — Re-Shim the Base
If the bolts were already reasonably snug, or if tightening them didn't stop the rock, the floor under the toilet base is uneven. This is common in older homes and rental properties where floors have settled over time. The fix is plastic toilet shims — tapered wedges designed specifically for this purpose. Do not use wood shims; they absorb moisture and rot.
- Slide a shim into the gap on the low side, tapping it gently until the toilet sits firm and flat without rocking.
- Check all four sides — sometimes two shims on opposite corners are needed.
- Once stable, score the shim flush with the edge of the toilet base using a utility knife, then snap off the excess.
Once shimmed and stable, caulking the base to the floor is worth a quick note. Many plumbing codes require it for sanitation reasons and to prevent the toilet from shifting further. However, some experienced plumbers deliberately leave the very back of the base un-caulked so that if the wax ring ever fails, water will weep out at the floor where you can see it rather than travel silently under the subfloor. Check your local code and make the call for your property — both approaches have merit.
When It's Time to Call a Plumber
If tightening the bolts and shimming the base still leaves you with a rocking toilet — or if the toilet has been rocking for a significant amount of time before you caught it — the job moves into plumber territory for a couple of reasons.
Possible Wax Ring Failure
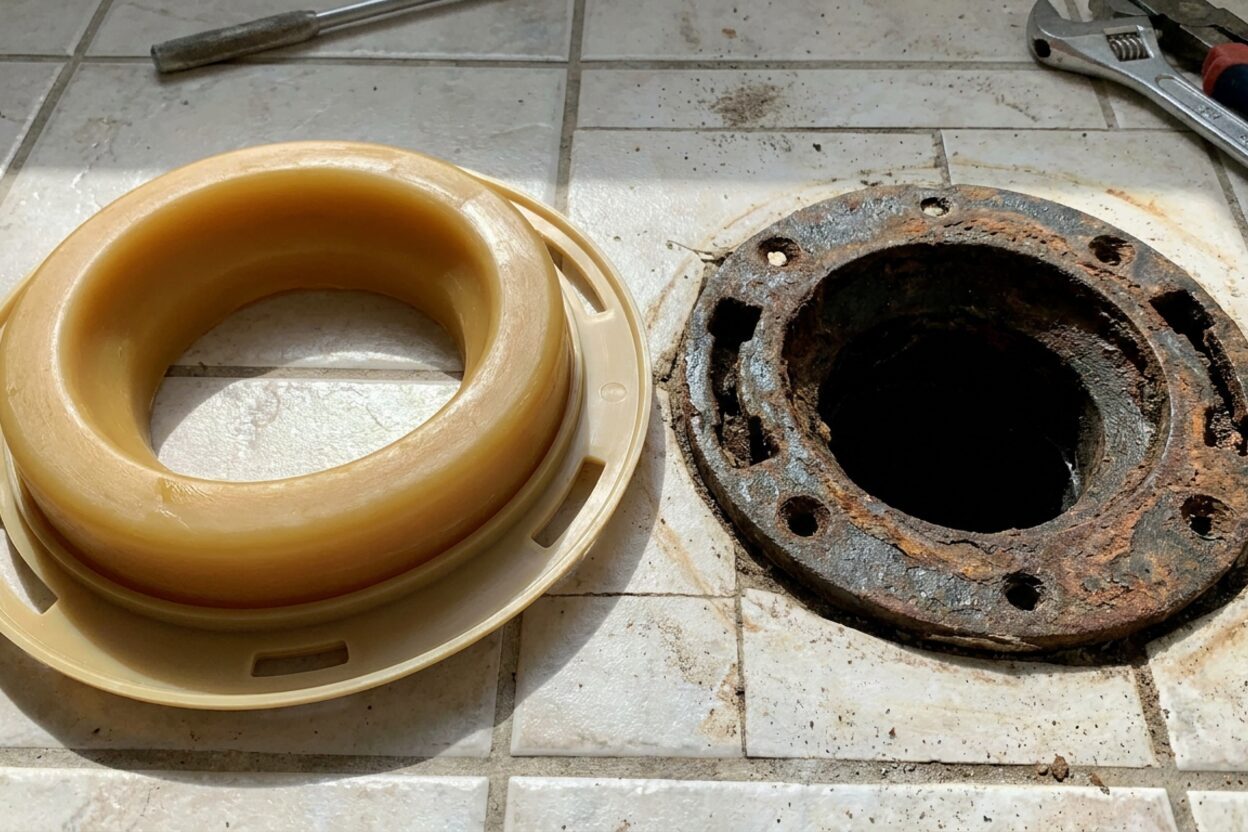
An unstable toilet that's been in use works the wax ring repeatedly. By the time you're investigating, the seal may already be compromised. A plumber (or skilled handyman comfortable with toilet pulls) will need to shut off the supply at the angle stop, empty and sponge out the tank and bowl, disconnect the supply line, remove the toilet (note: a toilet is heavy — typically 60 lbs or more — and should be lifted with a helper; lift with your legs, not your back, and set it on a protected surface such as cardboard or an old towel to avoid cracking the porcelain or damaging the floor), inspect and replace the wax ring, and reset the toilet properly. This is moderately straightforward work for someone experienced with it, but for a rental property it's worth getting it done right — a failed wax ring left unaddressed can mean rotted subfloor and a much larger repair bill.
For a full walkthrough of what that process involves, our wax ring and flange guides cover it in detail.
A Damaged or Low-Sitting Flange — Call a Plumber
This is the scenario that moves firmly into licensed plumber territory. If you pull the toilet and find that the floor flange is cracked, broken, or sitting below the level of the finished floor, it cannot be shimmed or waxed around. A flange that sits below floor level won't allow a wax ring to compress and seal correctly, and a cracked flange can't hold the closet bolts reliably. Flange repair or replacement — especially in older properties with cast-iron or lead drain lines — requires the right tools and materials, and depending on your jurisdiction, may require a permit. Check locally on code requirements before any drain work begins.
Tools and Materials You'll Need
- Adjustable wrench
- Flathead screwdriver (for prying caps)
- Needle-nose pliers (to hold bolt heads if needed)
- Plastic toilet shims (available at any hardware store)
- Utility knife
- Replacement closet bolt set (if bolts are corroded)
- Silicone caulk and caulk gun (optional, for base sealing)
If a toilet pull is needed: add a bucket, sponge, adjustable wrench or channel-lock pliers, a new wax ring, and a helper to lift the toilet safely.
Bottom Line for Your Property
Start with the bolts and shims — this resolves the majority of rocking toilet situations and is a reasonable handyman-level task. If the wobble persists after that, or if there's any sign of water damage, soft flooring around the base, or sewer odor in the bathroom, have a plumber pull the toilet and inspect the flange and wax ring before the next tenant move-in. Catching it now is considerably simpler than dealing with subfloor damage later.
 Oatey Fix-It Stainless Steel Flange Repair Ring, Adjustable Toilet Flange Repair Kit for Broken or Cracked Mounting Flanges, Secure Seal
View on Amazon →
Oatey Fix-It Stainless Steel Flange Repair Ring, Adjustable Toilet Flange Repair Kit for Broken or Cracked Mounting Flanges, Secure Seal
View on Amazon →
 Fluidmaster 7511 Toilet Wax Ring with Flange and Bolts
View on Amazon →
Fluidmaster 7511 Toilet Wax Ring with Flange and Bolts
View on Amazon →
 Flexible Plastic Shims 12pcs Kit Size Variety | Clear Leveling Kit for Home Improvement | Furniture Leg Stabilizers | Table & Toilet Shims - Trim-to-Fit Wedges | Stackable Design | Furniture Levelers
View on Amazon →
Flexible Plastic Shims 12pcs Kit Size Variety | Clear Leveling Kit for Home Improvement | Furniture Leg Stabilizers | Table & Toilet Shims - Trim-to-Fit Wedges | Stackable Design | Furniture Levelers
View on Amazon →
 2 PCS Toilet Floor Bolts and Caps Closet, Universal Toilet Bowl to Floors Bolt Kits Stainless Steel Toilets Fixing Bolts and Nuts Set Toilets Closet Bolt Set with Washers and Cover Cap Decorative
View on Amazon →
2 PCS Toilet Floor Bolts and Caps Closet, Universal Toilet Bowl to Floors Bolt Kits Stainless Steel Toilets Fixing Bolts and Nuts Set Toilets Closet Bolt Set with Washers and Cover Cap Decorative
View on Amazon →

Still need help? Ask a Plumbing Expert AD
Get a personalized answer from a verified plumbing expert. Describe your issue and get step-by-step help.