
How to Reseat a Toilet After It Leaks

Toilet Leaking at the Base — Do I Need to Reseat It?
Read full question
Three days ago my wife pointed out a faint wet ring forming around the bottom of the toilet in unit 2, and now that I'm looking at it closely I can't stop thinking about the damage it could be doing to the subfloor. Guests are checking in this weekend, so I need to sort this out fast. I've mopped it up twice and it keeps coming back, especially right after the toilet is flushed.
I've heard the fix involves pulling the toilet and replacing something called a wax ring, but I want to make sure that's actually the right diagnosis before I tear everything apart. Is reseating the toilet the right move here, and if so, what's the full process? Want to make sure I do this properly and don't leave guests with a bigger problem than when I started.
Quick Answer
Water around the toilet base isn't always a failed wax ring — rule out condensation, a loose supply line, or a loose closet bolt first. If leaking only happens after flushing, a wax ring replacement and toilet reseat is the likely fix. The job is medium difficulty, takes a few hours, and requires shutting off the water supply before you start.
Before You Pull the Toilet — Ruling Out Simpler Causes
The good news is that water appearing around a toilet base is a solvable problem. The important thing, though, is to identify which problem you're actually dealing with before committing to a full reseat. A failed wax ring is a common culprit, but it's one of several possibilities.
- Condensation (sweating): In humid conditions, a cold tank or bowl can drip water that pools at the base. This water will be clear and appear regardless of whether the toilet has been flushed. If it only shows up in warm, humid weather and vanishes when you run a dehumidifier, this is likely the cause — no reseating needed.
- Loose supply line or shutoff valve: Check the supply line connection at the bottom of the tank and at the shutoff valve. A small drip here can travel along the floor and appear to come from the base. Tighten the connection finger-tight plus a quarter turn and monitor.
- Loose closet bolts: The two bolts anchoring the toilet to the flange can work loose over time, especially with a rocking toilet. A slight gap in the wax seal from a wobbly toilet will leak. Before pulling everything apart, try pressing down firmly on the toilet and tightening the closet bolt nuts (plastic caps at the base pop off to expose them). If the toilet had visible rock to it, this matters.
- Failed wax ring: Water that appears only after flushing — often discolored or with a faint odor — points squarely at the wax ring seal. This is the scenario that calls for a full reseat.
Since you're describing water that returns after flushing, a compromised wax ring is the most likely diagnosis. Here's how to handle it properly.
The Parts Involved — What Each One Does
The Wax Ring
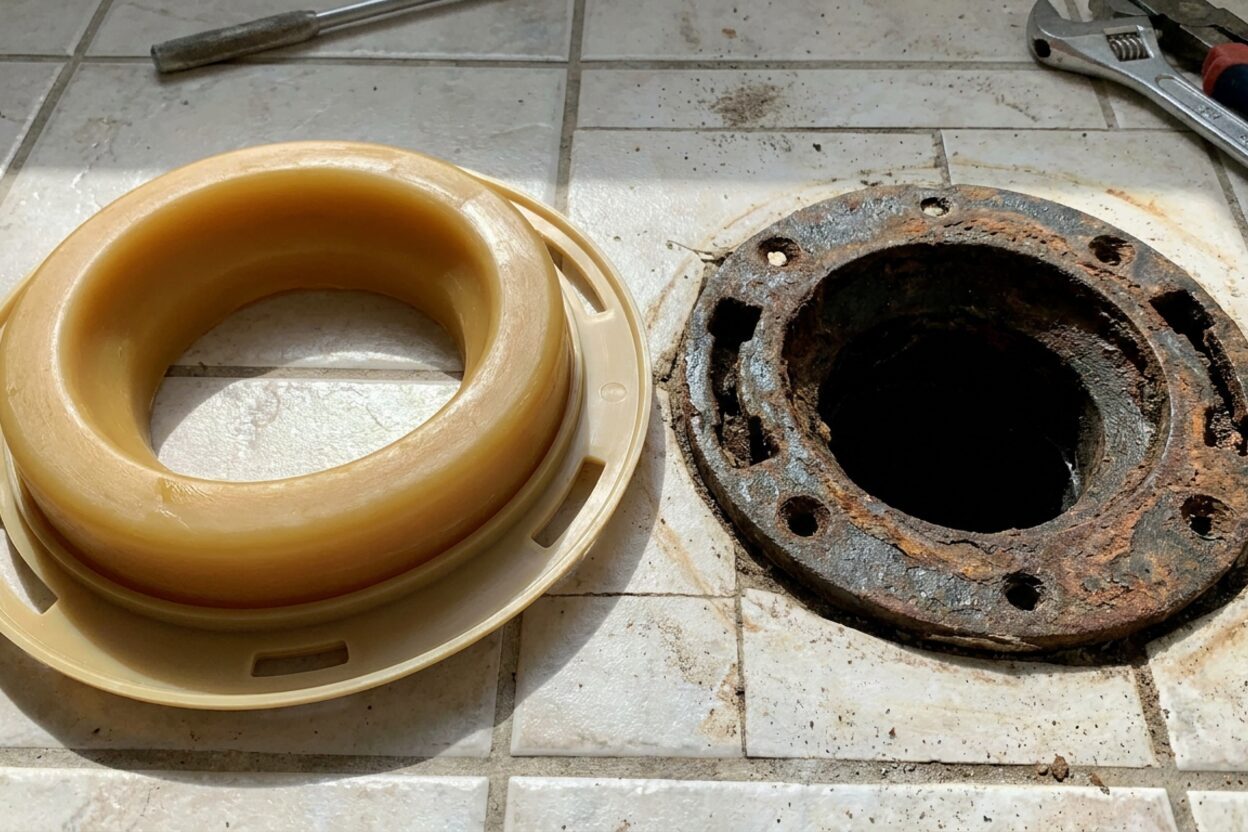
The wax ring sits between the bottom of the toilet horn (the outlet at the base of the bowl) and the flange opening in the floor. It creates a watertight, airtight seal so that wastewater routes into the drain without leaking onto the floor or allowing sewer gas into the room. Wax rings are single-use — once the toilet is lifted, the ring is compressed and deformed, and it must be replaced. Wax rings come in standard thickness and extra-thick versions, and in versions with or without a plastic horn extension. The right choice depends on how far your flange sits relative to the finished floor surface. Measure the flange height before buying — if the flange is flush with or slightly above the floor, a standard ring typically works; if it sits noticeably below the floor surface, you may need an extra-thick ring or a horn-extension ring. When in doubt, an extra-thick ring is the safer choice.
The Floor Flange (Closet Flange)
This is the fitting anchored to your drain pipe and secured to the subfloor. It's the foundation the toilet seats onto. Flanges can crack, corrode, or shift over time. Inspect the flange carefully once the toilet is removed. If the flange sits slightly below the finished floor level, a flange extender spacer kit (available at hardware stores) can raise it to the correct height — this is a manageable DIY repair. If the flange is cracked through, has sections missing, or the underlying drain pipe is damaged, stop here and consult a licensed plumber before proceeding.
Closet Bolts (T-Bolts)
These slide into slots in the flange and anchor the toilet to the floor. It's standard practice to replace them whenever you reseat a toilet — they're inexpensive, and corroded or bent bolts won't hold the new seal correctly.
Step-by-Step: Reseating the Toilet
- Shut off the water supply. Turn the angle-stop valve (on the wall behind or beside the toilet) clockwise until it stops. Flush to empty the tank, then sponge out any remaining water from both the tank and the bowl. Disconnect the supply line from the tank.
- Remove the tank bolts if the toilet is a two-piece unit. Most two-piece toilets are easier to move as separate pieces. Unscrew the two or three bolts inside the tank that connect it to the bowl, lift the tank straight up, and set it aside on a towel.
- Pop off the bolt caps and remove the nuts. The plastic caps at the base of the bowl cover the closet bolt nuts. Pry them off, unscrew the nuts with an adjustable wrench, and remove the washers.
- Lift the toilet. Get a helper — a toilet bowl and tank together can weigh 60 lbs or more, and the awkward shape makes solo lifting a back-injury risk. Lift with your legs, not your back. Lift straight up to avoid rocking the bowl. Set the toilet on its side on a drop cloth or cardboard to protect both the floor and the porcelain.
- Scrape away the old wax. Use a putty knife to remove all old wax from both the flange and the toilet horn. Stuff a rag into the open drain to block sewer gas while you work.
- Inspect the flange. Look closely for cracks, missing sections, or a flange sitting below floor level. If the flange is intact and flush with or slightly above the finished floor, you're good to proceed. If not, see the flange guidance in the parts section above before continuing.
- Install new closet bolts. Slide the new T-bolts into the flange slots, positioned so they'll align with the bolt holes in the toilet base. Space them evenly on each side of the flange opening.
- Position the new wax ring. The wax ring can be pressed onto the toilet horn (wax side out) or set on the flange — either method works. Many installers prefer attaching it to the horn so they can see exactly where it aligns during lowering.
- Lower the toilet onto the flange. With your helper, align the bolt holes in the base over the closet bolts and lower the toilet straight down. Once the base makes contact with the floor, press down firmly and evenly with your body weight to compress the wax. Do not lift the toilet again after this — doing so breaks the seal.
- Secure the toilet. Place washers and nuts onto the closet bolts. Tighten by hand, then snug with a wrench, alternating sides to keep even pressure. Stop when the toilet feels firmly seated and does not rock — do not continue tightening past that point. Porcelain cracks under excess force; when it feels solid and there is no movement, that is enough. If bolt threads extend too far above the nut, cut them with a hacksaw before snapping the caps back on.
- Reconnect tank and supply line. Reattach the tank if you separated it, reconnect the supply line, and turn the water back on slowly.
- Test thoroughly. Flush several times and watch the base closely for any water. Check the supply line connection as well.
A Note on Caulking the Base
Many plumbing codes require caulking a toilet to the floor for sanitation reasons and to prevent rocking. On the other hand, some experienced plumbers deliberately leave the very back of the base un-caulked — the reasoning being that if the wax ring ever fails again, water will escape visibly at the floor rather than accumulating hidden beneath the base and damaging the subfloor. Both approaches have merit. Check whether your local code requires caulking (requirements vary by jurisdiction), and make your decision accordingly. For an Airbnb property where fast detection of a new leak matters, that open rear gap argument has real practical value.
For more repair guidance, our wax ring and flange category covers related issues including flange repair and rocking toilet fixes.

Still need help? Ask a Plumbing Expert AD
Get a personalized answer from a verified plumbing expert. Describe your issue and get step-by-step help.