
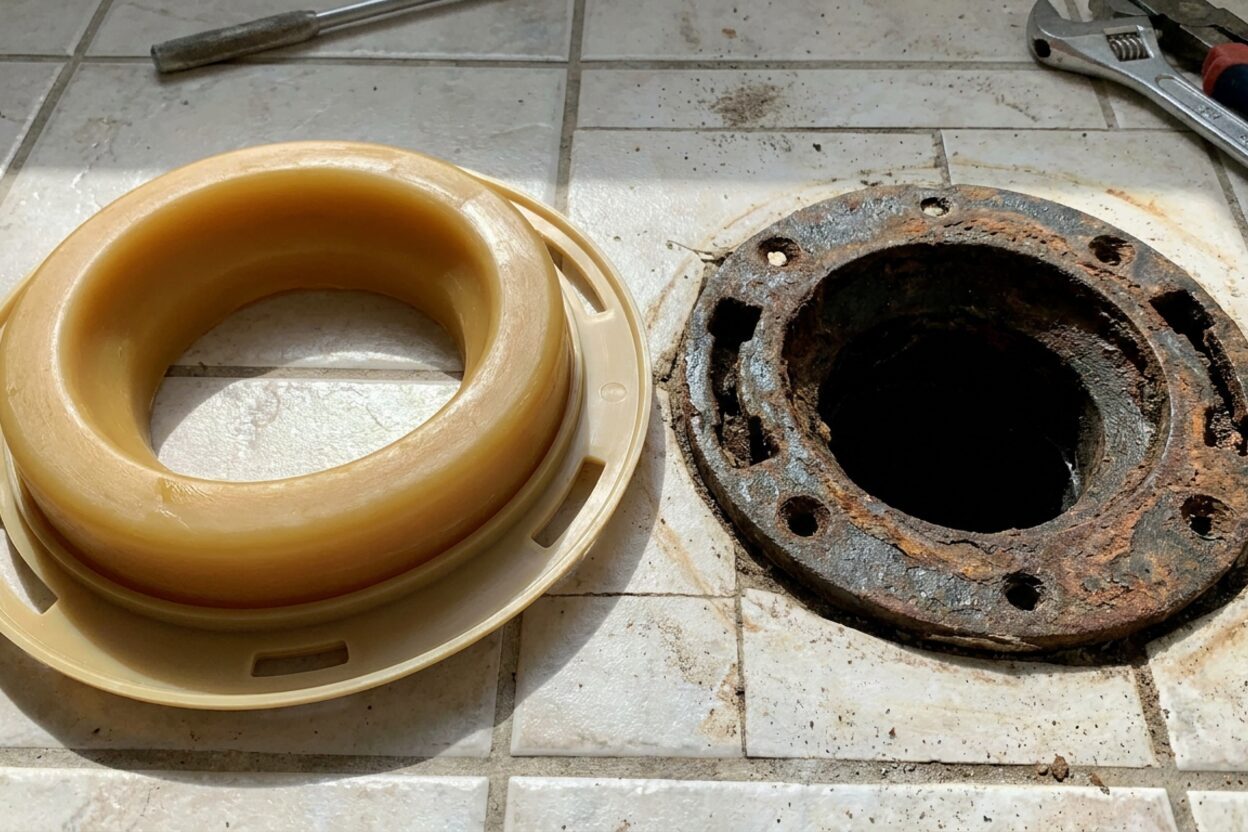
How to Fix a Broken Toilet Flange (DIY Guide)

Toilet flange cracked after movers dragged the toilet — how do I fix it?
Read full question
My toilet has been rocking slightly and leaking at the base ever since the moving crew repositioned it when we had new flooring put down in the bathroom last month. I pulled the toilet myself to take a look and found the flange is cracked on one side — one of the bolt slots is completely broken off. The pipe below looks fine, so I don't think I need to replace the whole drain, but the flange itself is clearly damaged. Is this something I can repair with a repair ring, or do I need to swap the whole flange out? I'd rather avoid calling a plumber if this is a manageable DIY fix.
Quick Answer
A cracked or broken toilet flange can usually be fixed without replacing the entire flange — a repair ring or a snap-in repair flange screws over the damaged one and gives you solid new bolt slots to work with. If the flange sits below finished floor level or the pipe itself is damaged, a full replacement or a call to a plumber is the smarter move. Either way, the fix finishes with a fresh wax ring and a properly seated toilet.
Good News: A Full Replacement Is Often Not Necessary
A cracked toilet flange — especially one with a broken bolt slot — is one of the more common repair calls, and in many cases you don't need to tear out the whole thing. If the drain pipe beneath is intact and the top of the flange sits at or slightly above the finished floor, a repair ring is a clean, reliable fix. If the flange is severely deteriorated, sitting too low, or the pipe is compromised, then a full swap makes more sense. Here's how to work through it.
Before You Do Anything Else
Since you've already pulled the toilet, you're ahead of the game. Make sure the water supply shutoff valve is closed and the tank is empty before doing any further work. Stuff a rag or a plumber's test plug into the open drain to block sewer gases from entering the room while you work — this isn't optional. Sewer gas contains hydrogen sulfide and methane. At the concentrations typical of a briefly open drain in a ventilated bathroom, the main concern is odor; at higher concentrations in unventilated spaces, hydrogen sulfide can be harmful. Keep the bathroom ventilated, work quickly, and don't leave the drain open longer than necessary.
Assess the Damage Before Choosing a Repair Method
Grab a flashlight and look carefully at what you have:
- Cracked flange body or broken bolt slot only: A repair ring is your best option. You don't need to disturb the existing flange at all.
- Flange sitting below finished floor level: This is a known call-a-plumber situation. A low flange makes it very hard to get a reliable wax seal, and shimming it up improperly leads to repeat leaks. An extender flange or a Set-Rite–style spacer kit may help if the gap is small, but significant drop is better left to a pro.
- Flange badly corroded, crumbling, or the pipe is cracked: Full replacement is warranted. Cast-iron pipe work in particular is best handled by a licensed plumber.
The Repair Ring Route (Most Common Fix)
For a cracked flange with a broken bolt slot — exactly your situation — a repair ring is the go-to solution in established plumbing practice. Two widely available options are:
- Oatey Fix-It Flange Repair Ring: A flat repair ring that installs over the damaged flange using screws and sealant (per the manufacturer's instructions). Check the product packaging for substrate compatibility and fastener requirements, as these vary by version.
- Twist-N-Set® Repair Flange: A tool-light design intended for fast installation into common drain pipe sizes and materials. Check the manufacturer's packaging to confirm compatibility with your pipe size and material before purchasing.
Both products are designed to sit at or just above finished floor level, which is exactly where you want the flange top to be for a proper wax ring seal.
Step-by-Step: Installing a Repair Ring
- Scrape the old wax off the existing flange thoroughly. A putty knife works well. The repair ring needs to seat flat, so don't leave lumps behind.
- Clean around the flange and remove any old fasteners or broken bolt tabs.
- If working on concrete, position the repair ring and mark your screw hole locations, then drill with a masonry bit and use the appropriate concrete screws. On a wood subfloor, standard wood screws work fine.
- Apply a bead of silicone sealant around the underside of the repair ring before setting it in place, per the manufacturer's instructions.
- Drive the fasteners evenly so the ring sits flat and doesn't rock.
- Slide the new closet (T) bolts into the slots on the repair ring — most kits include them.
- Remove the rag or test plug from the drain opening.
- Set a fresh wax ring either on the flange or on the toilet's horn (the underside outlet) — both placements are accepted. If placing on the flange, orient the wax side up toward the toilet. Follow the wax ring manufacturer's recommendation if provided. A standard wax ring works for a properly leveled flange; thicker rings are available for slight height gaps. Rubber gasket-style seals are also accepted practice.
- Toilets are heavy — a standard two-piece unit can weigh 60 lbs or more. Have a second person help you lower it onto the bolts to avoid back strain or dropping the bowl onto the flange. Lower the toilet carefully over the bolts, pressing straight down to compress the wax evenly. Avoid lifting and re-setting — each attempt compresses the wax further and reduces the seal.
- Tighten until snug by hand, then give each nut only a small additional turn with the wrench — tighten gradually and alternately, and stop well before the porcelain feels stressed. There is no fixed number of turns; feel and caution are your guide. Do not overtighten; porcelain cracks. If the toilet rocks at all before you tighten, use plastic toilet shims to stabilize it first.
- Reconnect the supply line, open the shutoff valve slowly, and flush several times while watching the base for any water.
A Note on Caulking the Base
Many plumbing codes require caulking the toilet to the floor for sanitation reasons and to prevent rocking. On the other hand, some experienced plumbers deliberately leave the back un-caulked so that a future wax ring failure shows up as a visible puddle rather than silently rotting the subfloor beneath a sealed base. Check what your local code requires — code varies by jurisdiction — and make the call from there.
When to Stop and Call a Plumber
This repair is firmly in DIY territory for most people, but reach out to a licensed plumber if you encounter: a flange that sits noticeably below the finished floor and can't be corrected with a standard spacer kit; a cracked or rotted subfloor under the toilet (a sign of a long-running leak); cast-iron pipe that needs cutting or rejoining; or sewer gas odors that persist even after the toilet is properly reseated. Those situations involve work where getting it wrong has real consequences. For more background on related repairs, see our wax ring and flange repair answers.

Still need help? Ask a Plumbing Expert AD
Get a personalized answer from a verified plumbing expert. Describe your issue and get step-by-step help.