
Toilet Tank Not Filling? Here's Why & How to Fix It

My Toilet Tank Is Eating Through My Water Supply — Why Won't It Fill?
Read full question
Nobody wants to discover that their vacation home toilet is struggling to fill the tank — especially when you've just arrived and you're already dealing with a list of things to check on. My toilet is running through water like crazy trying to refill, or sometimes barely filling at all, and it's making the whole flush cycle take forever. I noticed it right when I got here this trip, and the tank just sits there making a hissing noise without ever reaching a normal water level.
I'm not sure if it's something that happened while the house was sitting empty or if it's been a gradual thing I missed on my last visit. Either way, the toilet is burning through refill attempts and either running constantly or just not completing the fill cycle at all. Would love to know what's going on and how to keep it from happening again.
Quick Answer
A toilet tank that won't fill is almost always caused by one of four things: a faulty or worn fill valve, a partially closed or failing shutoff valve, a kinked or restricted supply line, or a float that's set too low. Identifying which one is the culprit takes about ten minutes of inspection, and most fixes are DIY-friendly with basic tools.
What's Actually Happening Inside the Tank
When a toilet tank won't fill — or fills painfully slowly — the water supply chain from the wall to the tank is the first place to investigate. That chain has three main links: the shutoff valve (angle stop) behind or beside the toilet, the supply line running from that valve to the tank, and the fill valve sitting inside the tank itself. A problem anywhere along that path starves the tank of water. Let's walk through each one, starting with the easiest checks.
Start Here: The Shutoff Valve and Supply Line
Before opening the tank lid, crouch down and look at the angle-stop valve on the wall. If the house sat empty for a stretch — common with vacation properties — that valve may have been turned partially closed intentionally or may have shifted over time. On a traditional oval-handle (compression) shutoff, turn it fully counterclockwise until it stops — turn gently; if the valve feels stiff or gritty, do not force it. An angle-stop that has sat unused for years can have corroded packing, and a valve that won't open smoothly may need replacement rather than forcing. On a quarter-turn ball valve, the handle should be parallel with the supply line when fully open.
While you're down there, run your hand along the supply line itself. Braided stainless lines are durable, but older plastic or chrome supply tubes can kink, crack, or develop mineral buildup inside the fitting that restricts flow to a trickle. If the line looks swollen, corroded at the connections, or is older than you can remember, replacing it is cheap insurance.
The Fill Valve: The Most Likely Culprit
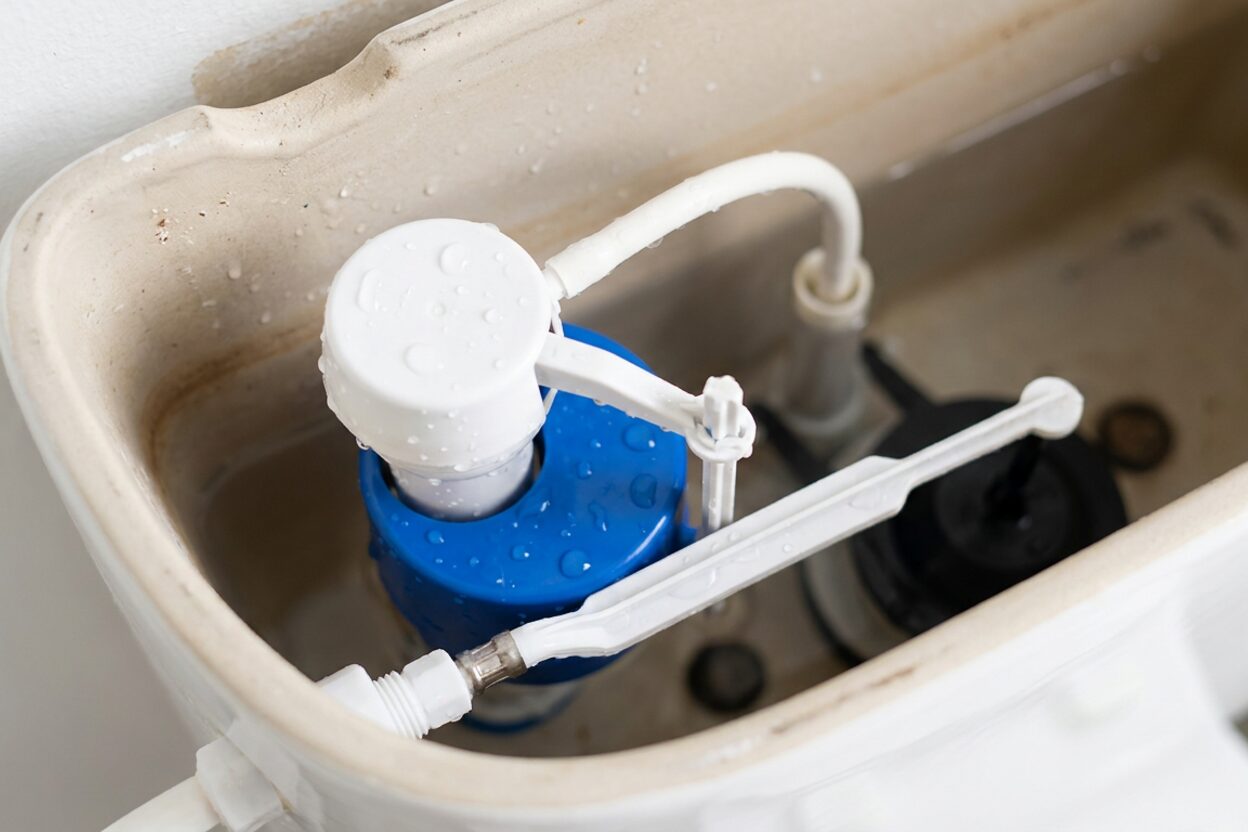
If the shutoff and supply line look fine, the fill valve inside the tank is a frequent cause of a slow or non-filling tank. The fill valve controls how water enters the tank and shuts off when the float signals that the tank is full. Over time — especially in homes with hard water or if in-tank cleaning tablets have been used — the fill valve's diaphragm or seal can wear, crack, or clog with debris and mineral scale.
How to inspect it
- Turn off the shutoff valve (clockwise until snug), then flush to empty the tank.
- Remove the fill valve cap — on many modern fill valves this twists off counterclockwise, but cap design varies by brand and model, so check your valve's markings or the manufacturer's instructions if it isn't obvious — and check the seal or diaphragm inside for cracks, mineral buildup, or debris caught beneath it.
- A quick field test: hold a cup over the open valve body, turn the water back on briefly, and observe the flow. Weak or erratic flow from the valve itself — not the supply line — points to a failing valve.
Modern fill valves are largely universal and adjustable, so a replacement unit from a hardware store will fit the vast majority of toilets without needing a model-specific part. Installation is typically a straightforward job — plan for anywhere from 20 minutes to an hour depending on your experience level and how cooperative the existing fittings are — and requires only an adjustable wrench and a towel.
Float Position: Often Overlooked
On ballcock-style valves (the older kind with a large plastic or rubber ball on an arm), the float ball can become waterlogged and sit too low, telling the valve to shut off before the tank is adequately filled. On modern fill valves, there's usually a float cup on the valve body with an adjustment clip or screw. Check that the float is set to allow water to rise to about 1 inch below the top of the overflow tube — most tanks have a water-level mark on the inside wall or on the overflow tube itself. If you are adjusting or replacing the fill valve, also confirm that the fill valve's critical-level (CL) mark — a small arrow or label on the valve body — sits at or above the top of the overflow tube. The CL mark must never be positioned below the overflow tube rim; that relationship is what maintains the valve's anti-siphon (backflow prevention) function. Adjust fill valve height before finalizing the water-level setting.
One More Thing to Check: Water Pressure
If multiple fixtures in the home are filling slowly, not just the toilet, the issue may be house-wide low water pressure rather than a single component. This is worth noting on a vacation home that's been sitting — municipal supply pressure can vary, and pressure-reducing valves (PRVs) can fail or drift over time. If you suspect low pressure throughout the house, that's a conversation for a licensed plumber or your water utility.
Keeping This From Happening Again
This is where vacation homeowners can save themselves a lot of trouble. A toilet that sits unused for weeks or months is harder on its components than one in daily use — seals dry out, mineral deposits harden, and slow leaks go unnoticed. Here's a practical prevention checklist:
- Flush before you leave, not just when you arrive. Leaving stagnant water in the tank for months allows mineral scale to build up on the fill valve seat and flapper.
- Skip the in-tank drop-in tablets. Bleach-based tablets are known to degrade rubber components — flappers, fill valve seals, and supply line washers — faster than normal use alone. If you want to keep things fresh between visits, consider a rim-hung clip-on product instead, which keeps chemicals out of the tank.
- Turn off the shutoff valve when the home will be empty for an extended period. This protects against a fill valve failure flooding the bathroom undetected. Just remember to open it fully when you return and check for any slow drips before walking away.
- Inspect the supply line every year or two. Braided stainless lines are more durable than older styles, but all supply lines eventually age. A brief visual check during each visit costs nothing.
- Address hard water proactively. If your vacation home has hard water, mineral buildup inside the fill valve is a recurring issue. A whole-house filter or a simple inlet screen on the fill valve (many valves include one — check the valve body where the supply line connects) can significantly extend valve life.
Tools and Parts You'll Want on Hand
- Adjustable wrench or channel-lock pliers
- Replacement fill valve (universal adjustable style fits most toilets)
- Replacement supply line (braided stainless, correct length for your installation)
- Towels or a small bucket for residual water
- Sponge for soaking up remaining tank water after flushing
For more help diagnosing what's going on inside the tank, our fill valve and flush valve guides cover the full range of fill valve types and replacement steps in detail. And if after replacing the fill valve you're still seeing problems, it may be time to have a plumber check the shutoff valve itself — angle-stop valves that have sat partially closed for years can fail to open fully or begin to drip, and replacing one involves working directly with the supply line coming out of the wall.
 Fluidmaster 400H-002 Performax Universal Toilet Fill Valve High Performance Tank and Bowl Water Control, 1-Pack, Multicolor
View on Amazon →
Fluidmaster 400H-002 Performax Universal Toilet Fill Valve High Performance Tank and Bowl Water Control, 1-Pack, Multicolor
View on Amazon →
 Korky QuietFILL Platinum Toilet Fill Valve - Universal Fits 99% of Toilets - Easy Height Adjust for Fast Install, 528MP
View on Amazon →
Korky QuietFILL Platinum Toilet Fill Valve - Universal Fits 99% of Toilets - Easy Height Adjust for Fast Install, 528MP
View on Amazon →
 Eastman 12 Inch Flexible Toilet Connector, 7/8 Inch Ballcock x 3/8 Inch Compression, Stainless Steel Braided Hose, 48088
View on Amazon →
Eastman 12 Inch Flexible Toilet Connector, 7/8 Inch Ballcock x 3/8 Inch Compression, Stainless Steel Braided Hose, 48088
View on Amazon →

Still need help? Ask a Plumbing Expert AD
Get a personalized answer from a verified plumbing expert. Describe your issue and get step-by-step help.