
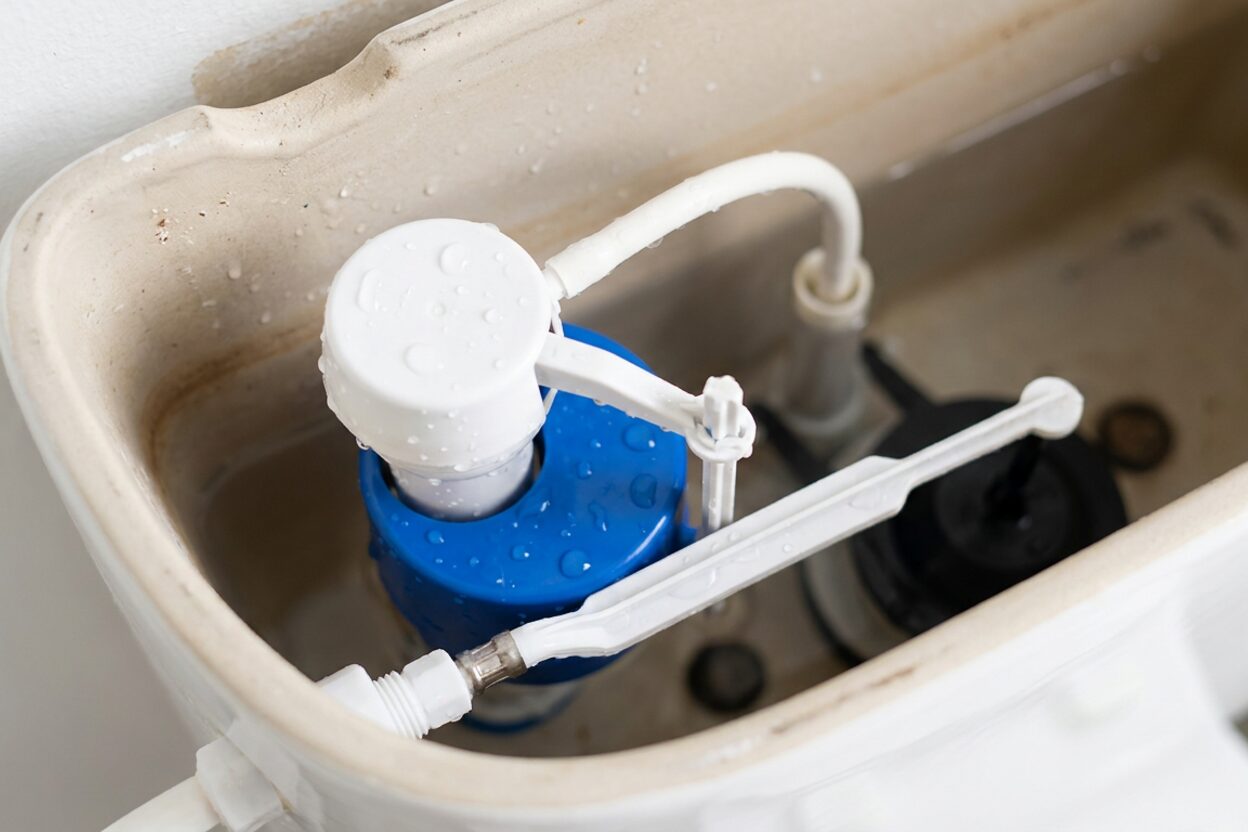
How to Replace a Toilet Fill Valve (Step-by-Step)

My toilet tank won't stop running when it gets hot outside
Read full question
Found that my toilet tank starts making a constant trickling sound whenever the temperature outside climbs above about 85°F — during cooler months it works perfectly fine. I popped the lid off the tank and it looks like the fill valve is the culprit, maybe warped or worn from the heat cycling, because water just keeps creeping past it. The toilet is about eight or nine years old, two-piece, standard builder-grade setup.
I've never swapped out a fill valve before and I want to make sure I do it right the first time without cracking anything or ending up with a leak under the tank. What's the correct process for pulling the old valve and getting a new one seated and adjusted properly?
Quick Answer
Replacing a toilet fill valve means shutting off the water supply, draining the tank, unscrewing the old valve's lock nut from beneath the tank, and dropping in an adjustable-height replacement. Once the new valve is in, you set its critical-level mark about an inch above the top of the overflow pipe, reconnect the supply line, and set the float so the water rests about an inch below the tube's top. The whole job typically takes under an hour with basic hand tools.
Why a Fill Valve Fails — and Why Heat Makes It Worse
The fill valve is the component inside your tank that opens when water drains out during a flush and closes again once the tank refills to the correct level. Nearly all modern fill valves use a rubber or plastic diaphragm and a float mechanism to sense water level. The problem is that the seals, o-rings, and diaphragm inside the valve are made of materials that stiffen, swell, or crack over time — and heat accelerates that process considerably. If your toilet misbehaves only when outdoor temperatures spike, one possible explanation is that the valve's internal seal has degraded to the point where temperature-related changes push it past its tolerance, allowing water to trickle by continuously. Once that seal is compromised, the valve won't self-heal when it cools down; replacement is the correct fix.
The good news is that fill valves are almost universally replaceable with aftermarket units sold at any hardware or home improvement store. Current universal fill valves — widely available at any hardware or home improvement store — are height-adjustable and designed to fit the vast majority of two-piece toilets. No special parts ordering is typically required.
What You'll Need Before You Start
- Adjustable wrench or channel-lock pliers
- Bucket (placed under the tank's exterior base)
- Old towels or rags
- Turkey baster or small wet-dry vacuum (for residual water)
- Replacement fill valve (universal, height-adjustable)
- Replacement supply-line washer (optional but recommended while you're in there)
Step 1 — Cut the Water and Empty the Tank
Close the shut-off valve on the supply line below and behind the toilet by turning it clockwise until it stops. Flush the toilet and hold the lever down for several seconds to drain as much water as possible out of the tank. Whatever remains — and there will be some — can be soaked up with towels or pulled out with a turkey baster or wet-dry vacuum. Getting the tank as dry as possible makes the job cleaner and gives you a clear view of the valve base.
Safety note: If the shut-off valve is corroded and won't close fully, you may need to address that valve first or locate your home's main water supply shutoff. Do not attempt to work on the fill valve with pressurized water still entering the tank. You can find more detail on dealing with stubborn shutoffs in our supply and shutoff valve guides.
Step 2 — Remove the Old Fill Valve
With the tank lid set safely aside, disconnect the water-supply hose from the threaded tailpiece at the bottom of the fill valve (just below the tank floor). Have your bucket ready — a small amount of water will drain out. Next, reach under the tank and loosen the plastic or brass lock nut that holds the valve's shank to the tank bottom. Turn it counterclockwise; in most cases this can be done by hand, though older valves may need a wrench. Once the nut is off, lift the old valve straight out of the tank.
While the opening is exposed, take a moment to wipe away any mineral scale or debris around the tank hole. A clean seat makes for a better seal on the new valve's rubber gasket.
Step 3 — Set the New Valve Height
This step is the one most people skip and then regret. Nearly all universal fill valves have an adjustable shank — you twist the upper body relative to the lower body to extend or shorten the overall height. The goal is to position the valve so its critical-level mark (the “CL” line printed near the top of the valve body) sits at least one inch above the top of the overflow pipe — check your fill valve's instructions for the manufacturer's recommended clearance. That clearance matters: it keeps the valve's inlet safely above the tank's maximum water line so tank water can never siphon back into your home's water supply.
Set the height before the valve goes into the tank — it's much easier to adjust on the workbench than while it's already installed.
Step 4 — Install the New Valve
Drop the new valve's shank through the hole in the tank bottom, pressing the rubber gasket firmly against the tank floor from the inside. From beneath the tank, snug the lock nut by hand, then tighten slightly with pliers — just enough to compress the gasket and create a watertight seal. Stop as soon as you feel resistance; the rubber gasket does the sealing work. Do not overtighten. Porcelain cracks under excess torque, and the rubber gasket does the sealing work, not sheer force.
Clip the refill tube (the small flexible tube attached to the valve body) onto the top of the overflow pipe. Reconnect the supply hose to the tailpiece and hand-tighten, finishing with a slight snug turn — again, don't crank it.
Step 5 — Set the Float and Test
Turn the shut-off valve back on slowly and let the tank fill. Watch the water level as it rises. The target fill level is typically about half an inch to one inch below the top of the overflow pipe — look for the water-level mark molded inside your tank or follow the fill valve manufacturer's instructions, as the correct setting varies by model. Any higher and water will trickle into the bowl continuously (a so-called phantom flush or running toilet). Most modern valves let you adjust this by twisting a dial on the float cup or by bending a float arm on older-style ballcock designs.
Once the tank fills and the valve shuts off, flush two or three times and watch both the tank floor and the area beneath the tank for any drips. A dry run of five minutes with the tank filled is a good final check before replacing the lid.
When the DIY Route Has Limits
Replacing a fill valve is genuinely one of the more approachable plumbing repairs — the parts are inexpensive, universal, and the process doesn't require cutting pipe or soldering. That said, a few situations are worth pausing on. If your shut-off valve is seized, leaking at the packing nut, or simply won't close, fix or replace that valve before touching the fill valve. If you notice the tank itself is cracked, or if the leak seems to be coming from the bolts connecting the tank to the bowl rather than the fill valve, those are separate repairs. And if multiple fixtures in your home are backing up or behaving oddly at the same time, that points toward a main-line issue rather than anything inside the toilet tank. For a broader look at common tank issues, our toilet repair guides cover those scenarios in detail.

Still need help? Ask a Plumbing Expert AD
Get a personalized answer from a verified plumbing expert. Describe your issue and get step-by-step help.