
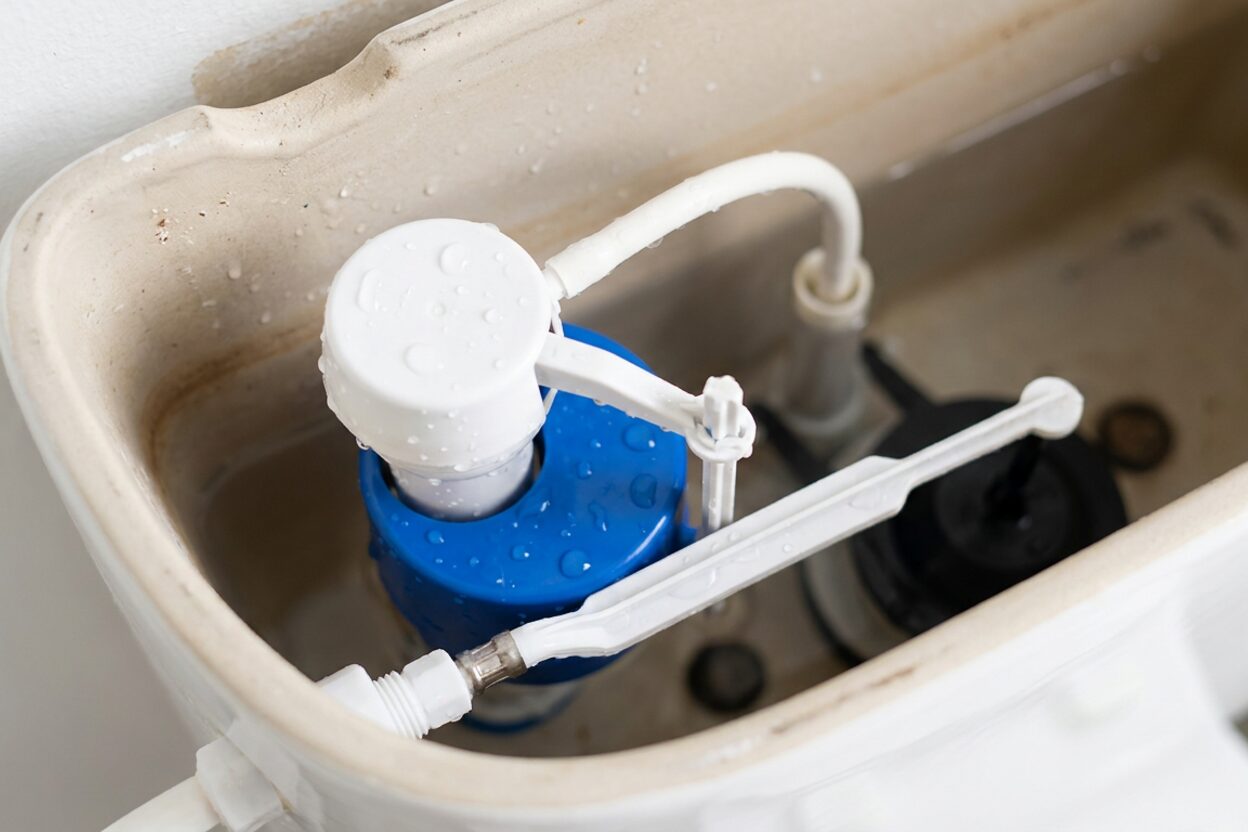
How to Adjust Toilet Tank Water Level

How do I raise or lower the water level in my toilet tank?
Read full question
During a walkthrough of my new place, I noticed the toilet tank seemed to be filling way higher than I remembered at my old house — nearly to the top of the overflow tube. At my last home I ended up adjusting something on a float ball and it fixed the problem right away, but this toilet has a totally different setup inside the tank with a vertical fill valve that I don't recognize at all.
I want to get the water level set correctly so it flushes properly without wasting water or running constantly. Is there a standard target height I should be aiming for, and how do I actually make the adjustment on these newer-style fill valves? I'd rather figure this out myself before calling anyone in.
Quick Answer
The correct water level in a toilet tank should sit about one inch below the top of the overflow tube — the tall plastic tube standing near the center of the tank. Adjustment depends on what type of fill valve you have: a float ball on an arm, a float cup on a vertical shaft, or a floatless pressure-sensing valve. Each has its own simple adjustment method, and the whole job usually takes under 30 minutes.
First, Know Your Target Water Level
Before touching anything, pull off the tank lid and look for a water level mark. Many tanks have a molded line or a painted mark on the inside wall — that's your manufacturer's target. If there's no mark, the widely accepted rule of thumb in plumbing practice is to set the water surface approximately one inch below the top of the overflow tube (the tall pipe in the center or rear of the tank). Too high, and water trickles down the overflow tube constantly, causing a phantom run. Too low, and the flush will feel weak.
The good news: this adjustment rarely requires any special parts. Fill valves are largely adjustable by design, and the fix is typically just turning a screw, bending an arm, or twisting the valve body.
What You'll Need
- Flat-head screwdriver
- Phillips-head screwdriver
- Ruler or tape measure
- Slip-joint pliers (may not be needed)
- Towel or rag for any drips
Identify Your Fill Valve Type — Then Follow That Section
Look inside your tank. You'll see one of three common setups:
☐ Type 1: Float Ball on a Horizontal Arm (Older Style)
This is the classic setup — a rubber or plastic ball attached to a metal or plastic arm that connects to a valve on the side of the tank. The ball rises with the water and shuts off flow when it reaches a set height.
- To raise the water level: Gently bend the float arm upward, or if it has an adjustment screw where the arm meets the valve, turn it clockwise to allow the float to ride higher before shutting off.
- To lower the water level: Bend the arm slightly downward, or turn the adjustment screw counterclockwise.
- Make small adjustments, then flush and let the tank refill. Check the level. Repeat as needed.
- If the float ball itself has water inside it (it feels heavy when you unscrew it), the ball is waterlogged and should be replaced — a new one is inexpensive and widely available.
☐ Type 2: Float Cup on a Vertical Fill Valve (Most Common Today)
This is almost certainly what Andrew is seeing — a tall vertical column with a plastic float cup or ring that slides up and down the shaft. This style is common on Fluidmaster-type valves and their equivalents, though the adjustment method is similar across most brands.
- Pinch-and-slide method: Many float cup valves use a pinch clip on the side of the float — pinch it, slide the float up to raise the level or down to lower it, then release. If your valve has no clip, look for a rotating collar or adjustment screw on the float arm instead. Consult the label or documentation for your specific valve if unsure.
- Adjustment screw method: Some models have a screw on top of the valve body. Turning the screw in one direction raises the level and the other lowers it — check the label on your valve body or the manufacturer's instructions for the correct direction, as this varies by brand and model.
- After each adjustment, flush the toilet and let the tank refill completely before measuring. The overflow tube is your reference point — aim for about one inch below its rim.
- Important: when repositioning the fill valve or adjusting its height, confirm that the critical-level (CL) mark molded on the valve body remains at or above the top of the overflow tube. Only the water surface target sits below the overflow tube — the valve's CL mark must stay above it to preserve backflow protection.
☐ Type 3: Floatless / Pressure-Sensing Fill Valve
Some newer or specialty toilets use a valve with no visible float at all — it senses water pressure at the bottom of the tank to know when to shut off. These typically have an adjustment screw or dial on the top or side of the valve body. Turn it in small increments, flush, and recheck — the appropriate increment varies by valve, so consult the label on your valve or the manufacturer's documentation for guidance. Consult the label on your valve or the toilet's documentation for the specific direction, since these vary more by brand.
☐ After Adjusting: Run a Quick Sanity Check
Once you've set the level, do the following before putting the lid back on:
- Flush the toilet and watch the tank refill. The fill valve should shut off cleanly when water reaches your target level.
- Wait two minutes and look down the overflow tube — you should not hear or see any water trickling into it.
- Check that the flapper seats fully after the flush. A water level that's too high often masks a flapper problem — if water keeps running even after a correct adjustment, the flapper may need attention. You can find more on that in our guides for flappers and flush handles.
☐ If Adjusting Doesn't Hold — or the Valve Won't Cooperate
Fill valves don't last forever; they're subject to mineral buildup and wear, and a valve that can't hold its adjustment reliably is usually on its way out. Replacement fill valves are widely available and fit most standard two-piece toilets, but confirm compatibility with your toilet model before purchasing — one-piece, pressure-assist, and wall-hung toilets may require specific valves. Turn off the supply at the shutoff valve, flush and sponge out any remaining water before disconnecting anything — this keeps the job clean and avoids a mess.
If you're also noticing the toilet running between flushes or refilling on its own, that's often a fill valve or flapper issue working together. Our fill and flush valve guides cover those scenarios in more detail.
A Note on Water Pressure
If your water level looks fine but the tank takes a very long time to refill, the issue may be at the supply shutoff valve — make sure it's fully open. Partially closed shutoff valves are a common culprit for sluggish tank fill times and are easy to overlook.

Still need help? Ask a Plumbing Expert AD
Get a personalized answer from a verified plumbing expert. Describe your issue and get step-by-step help.