
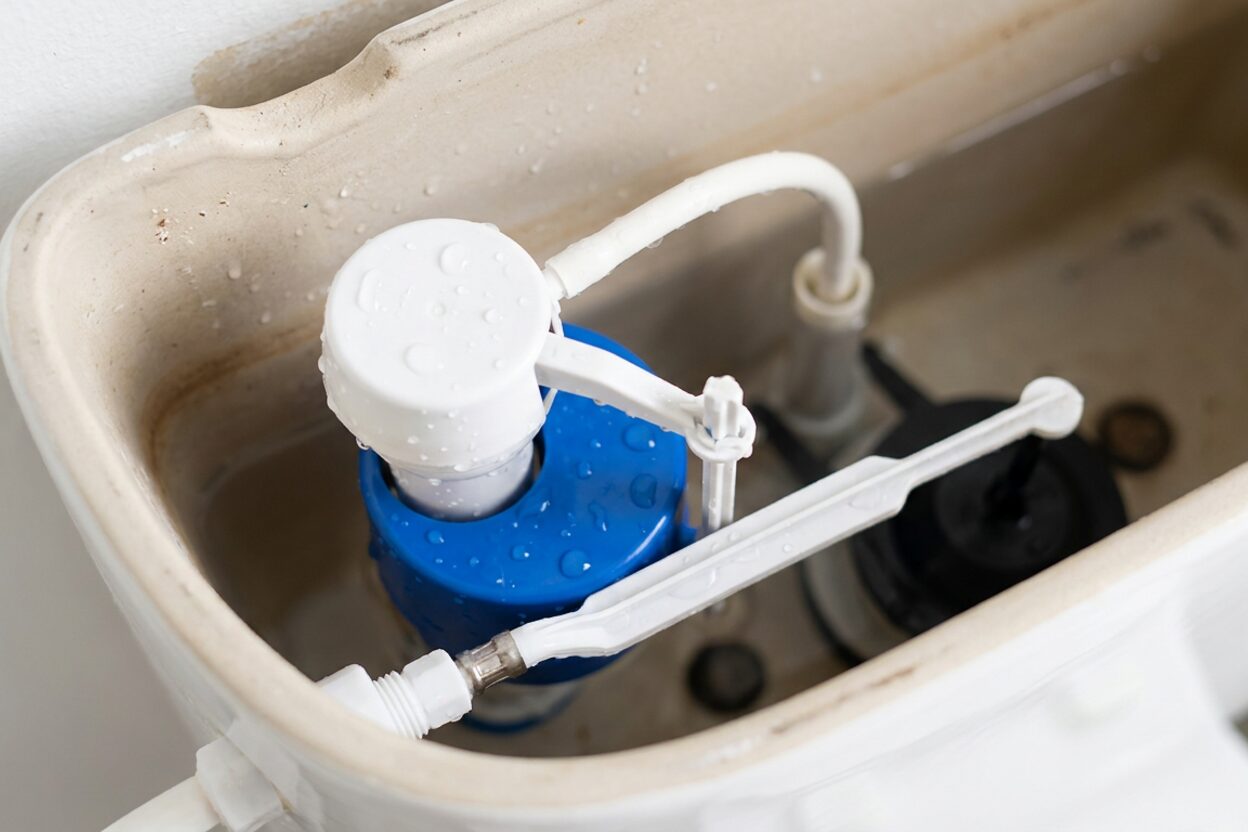
Why Does My Toilet Fill Valve Keep Running?

My Toilet Fill Valve Keeps Running and Won't Shut Off
Read full question
My toilet in the main bathroom started making a constant hissing sound a few days ago, and the fill valve just never seems to stop running — even a good 10 or 15 minutes after I flush. The tank appears to fill to the normal level, but the water just keeps trickling in like it doesn't know when to quit. I can hear it from the hallway, which is getting pretty annoying.
I'm not sure if this is a fill valve problem specifically, or if something else in the tank is causing it. The toilet is probably eight or nine years old — nothing fancy, just a standard two-piece we had installed when we redid the bathroom. I haven't noticed any water on the floor, so I don't think it's leaking externally. Is this something I can sort out myself, or am I looking at a bigger issue?
Quick Answer
A constantly running fill valve is almost always caused by one of three things: a worn flapper letting water leak silently into the bowl, a float set too high so water spills into the overflow tube, or debris and mineral buildup inside the fill valve itself preventing it from closing. Working through each of these in order will usually solve the problem without calling a plumber.
What's Really Going On
That relentless hissing almost always comes down to one core problem: the fill valve thinks the tank is never full, so it never shuts off. This happens either because water is quietly leaking out of the tank (usually through a faulty flapper), the water level is set too high and spilling into the overflow tube, or the fill valve itself is clogged or worn and can't physically close. Working through the three suspects in order below will pinpoint the cause quickly.
Before touching anything inside the tank, turn off the water at the shutoff valve (the angle stop on the wall behind the toilet), flush once to drain the tank, and sponge out any remaining water. That keeps things dry and safe while you work.
Step-by-Step Diagnosis and Fix
Check for a Leaking Flapper First
A faulty flapper is a frequent culprit and a good place to start. Drop a few drops of food coloring into the tank — don't flush — and wait about 10 minutes. If color appears in the bowl, the flapper isn't sealing and water is constantly draining away, triggering the fill valve to keep running.
Inspect the flapper by pressing down on it with your finger while the water is on. If the running stops immediately, the flapper isn't seating properly. Look for warping, cracks, or a buildup of mineral scale around the rubber edges or the seat it rests on. Flappers are largely universal and inexpensive; replacement is usually straightforward. With the water off and tank empty, unhook the old flapper from the overflow tube ears and disconnect the chain from the flush handle arm, then snap the new one into place. Make sure the chain has enough slack that the flapper seals fully when the handle is at rest, but not so much that the chain can slip under the flapper — adjust by trial and error to find the right length for your specific setup.
Check the Float Height and Overflow Tube
Look at the water level inside the tank. It should sit about an inch below the top of the overflow tube (the tall open tube in the center of the tank). If water is at or above the tube's rim, it's constantly draining into the bowl and the fill valve never gets the signal to stop.
Adjusting the float height fixes this. On a ball-float style (the older arm-and-ball design), bend the arm gently downward or turn the adjustment screw to lower the shutoff point. On a modern tower-style fill valve, there's typically a clip or a turning mechanism on the shaft — rotate or slide it downward to lower the target water level. Aim for the water to sit about one inch below the top of the overflow tube. Turn the water back on briefly to confirm the tank stops filling at the right point.
Note: the water level target (about one inch below the overflow tube rim) is separate from the fill valve's critical-level (CL) mark — the arrow or line stamped on the valve body. The CL mark must sit at least one inch ABOVE the top of the overflow tube to maintain backflow protection. Check this any time you adjust valve height or install a new valve.
Clean or Replace the Fill Valve
If the flapper is fine and the float is set correctly but the valve still runs, debris or mineral scale is likely preventing the valve's internal seal from closing. This is especially common after any work on the supply line, or in homes with hard water.
To clean the valve cap: turn off the supply and flush the tank empty. Hold down the fill-valve cap with one hand, then unlock it according to your valve's instructions — the direction and amount of rotation vary by manufacturer, so check the label on the valve or the documentation that came with it. A common design uses a short counterclockwise turn, but do not assume this applies to your valve. With the cap off, turn the water on briefly with your thumb over the opening to flush debris upward and out. Reassemble the cap, restore water supply, and check whether the hissing stops.
If cleaning doesn't help, or if the valve is visibly cracked or corroded, replacement is the reliable fix. Modern fill valves from reputable brands are widely available at hardware stores and are designed to fit the vast majority of toilets. Look for an adjustable-height model with a universal fit designation, an anti-siphon CL mark, and internal seals rated for your local water pressure. Bring the old valve or its model number when shopping to confirm compatibility. They feature adjustable height ranges, improved seals rated to handle higher water pressure, and in some models, internals designed to resist hard-water buildup — check the packaging for the features included in your chosen valve. Installation is usually straightforward for most homeowners, though the time will depend on your experience level and the condition of the existing hardware (corroded locknuts or a stiff shutoff valve can add time): shut off the supply, flush, disconnect the supply line from the bottom of the tank, unscrew the locknut holding the old valve, drop the new valve in, set the valve height so the CL mark on the valve body sits at least one inch ABOVE the top of the overflow tube, which will result in the water filling to a level about one inch below the overflow tube rim, reconnect the supply line, and restore water. See our fill valve troubleshooting articles for more detail on specific valve types.
Inspect the Overflow Tube and Refill Tube
While you have the tank open, glance at the small refill tube — the thin flexible tube clipped to the top of the overflow tube. If it's pushed down into the overflow tube rather than just resting at the rim, it can siphon water continuously into the bowl. Pull it up so it sits just above the rim of the overflow tube and clip it there.
Tools and Parts You'll Need
- Adjustable pliers or channel-lock pliers (for the locknut if replacing the valve)
- Sponge or small towel
- Bucket
- Food coloring (for flapper test)
- Replacement flapper (if flapper is faulty)
- Replacement fill valve (if cleaning doesn't resolve the issue)
When to Call a Plumber
Most running-fill-valve problems are genuinely DIY-friendly. However, if you find the tank itself is cracked, if the shutoff valve behind the toilet won't fully close (making it impossible to work safely), or if you notice water on the floor that you can't trace to the tank, those situations warrant a licensed plumber. A running toilet is also worth addressing promptly — beyond the noise, it can add meaningfully to your water bill over time.
If you want a broader look at common tank and valve repairs, our toilet repair guides cover everything from flapper replacement to full tank rebuilds.
 Fluidmaster 400H-002 Performax Universal Toilet Fill Valve High Performance Tank and Bowl Water Control, 1-Pack, Multicolor
View on Amazon →
Fluidmaster 400H-002 Performax Universal Toilet Fill Valve High Performance Tank and Bowl Water Control, 1-Pack, Multicolor
View on Amazon →
 Korky QuietFILL Platinum Toilet Fill Valve - Universal Fits 99% of Toilets - Easy Height Adjust for Fast Install, 528MP
View on Amazon →
Korky QuietFILL Platinum Toilet Fill Valve - Universal Fits 99% of Toilets - Easy Height Adjust for Fast Install, 528MP
View on Amazon →
 Korky 2017BP Standard 2-Inch 2X Ultra High Performance Universal Long Lasting Rubber-Easy to Install-Made in USA Toilet Flapper, 1 Count (Pack of 1), Red
View on Amazon →
Korky 2017BP Standard 2-Inch 2X Ultra High Performance Universal Long Lasting Rubber-Easy to Install-Made in USA Toilet Flapper, 1 Count (Pack of 1), Red
View on Amazon →

Still need help? Ask a Plumbing Expert AD
Get a personalized answer from a verified plumbing expert. Describe your issue and get step-by-step help.