
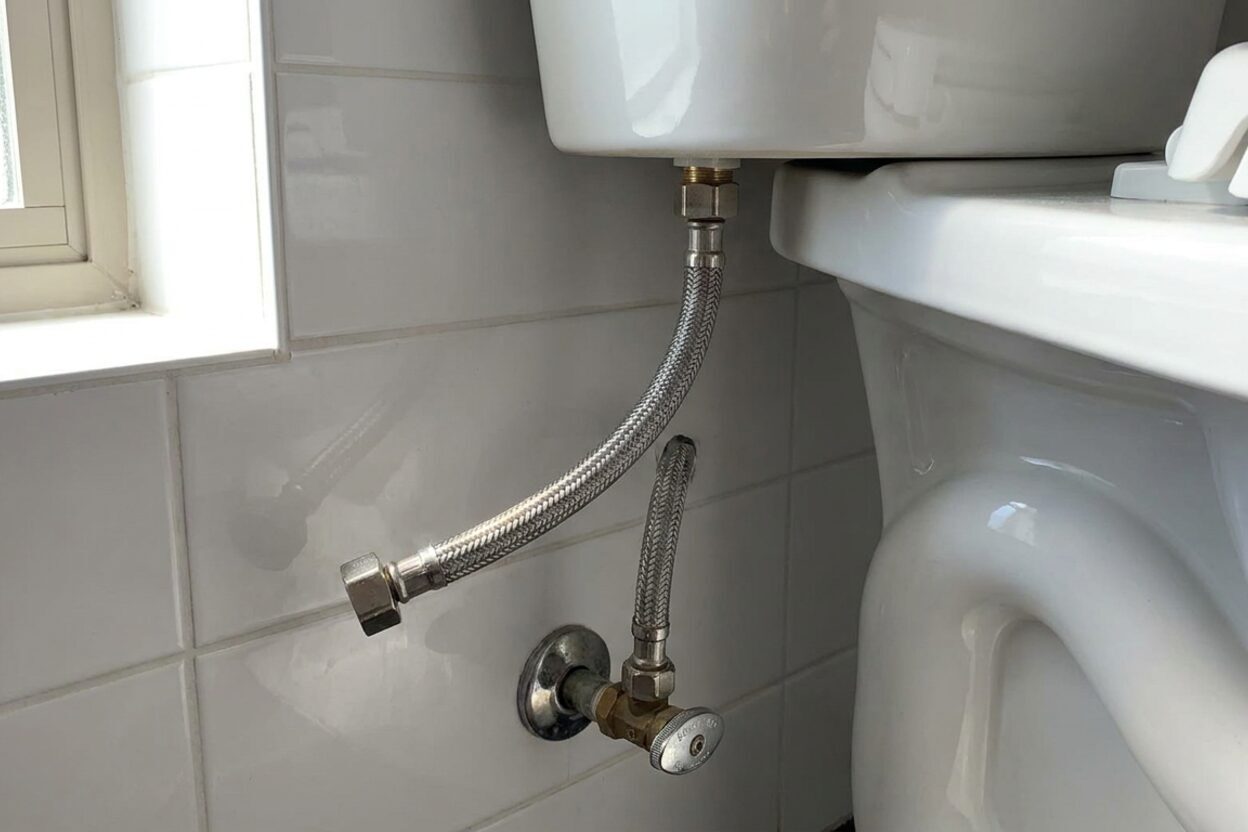
Why Is My Toilet Supply Line Leaking?

Why Is My Toilet Supply Line Leaking and How Do I Fix It?
Read full question
Looked under the tank this morning and spotted a slow drip coming from the supply line — there's already a small puddle forming on the floor. Got my tools out and I'm ready to tackle this myself, I just want to make sure I understand what's actually causing it before I start swapping parts. The line doesn't look obviously cracked, so I'm not sure if it's the fittings, the washers, or the line itself that's the problem. Is this something I can diagnose and fix on my own, or are there situations where I'd need to call someone in?
Quick Answer
A toilet supply line most commonly leaks because of a worn rubber washer or seal at one of the connection points, and snugging up the compression nut or replacing the washer usually solves it in minutes. If the line itself is cracked or corroded, replacement is the right call. Identifying exactly where the drip originates — at the shutoff valve, along the hose, or at the fill valve — tells you which fix to make.
Start Here: Pinpoint Where the Drip Is Coming From
Before reaching for a wrench, dry everything off with a rag and watch closely for a minute or two. A toilet supply line has two connection points — one at the shutoff (angle-stop) valve coming out of the wall or floor, and one at the fill valve at the bottom of the tank. The leak almost always originates at one of those two spots, or occasionally along the body of the hose itself. Knowing which narrows your fix to a very short list.
- Drip at the shutoff valve end: Likely a worn compression fitting, a degraded rubber seat washer inside the valve, or a loose nut.
- Drip at the tank/fill-valve end: Usually a dried-out or cracked rubber washer, a loose ballcock nut, or a cracked plastic coupling.
- Drip along the hose body: The line itself has failed — a crack, pinhole, or delaminated braiding. Time for a replacement line.
The Most Likely Culprit: A Failed Washer or Loose Nut
A very common cause of a supply line leak is a rubber washer or seal that has dried out, hardened, or been chewed up by mineral deposits from hard water. These small washers create the watertight seal inside each compression fitting. Over time — and the timeline varies a lot depending on water chemistry, temperature swings, and water pressure — they simply stop sealing properly.
High household water pressure is another frequent contributor. If your home's pressure runs consistently high, it puts constant stress on the hose and its fittings, which can cause nuts to back off slightly or fittings to develop small cracks. Vibration from the fill valve cycling open and closed repeatedly throughout the day can have the same loosening effect over months and years.
Improper installation is also worth keeping in mind. An over-tightened compression nut can actually crack the fitting or deform the washer rather than sealing it better — more torque is not always the answer. Equally, a nut that was cross-threaded or never fully seated won't hold a seal no matter how hard you tighten it.
What You'll Need
- Adjustable wrench or channel-lock pliers
- Bucket and old towels or rags
- Replacement supply line (if the hose itself is cracked)
- Replacement rubber washers or a supply-line repair kit (if reusing the line)
- Plumber's tape (PTFE/Teflon tape)
- Flashlight or headlamp
How to Fix It — Step by Step
- Shut off the water first. Turn the shutoff valve clockwise until it stops. Flush the toilet to empty the tank, then lay a towel under the supply line to catch any residual water.
- Unscrew the supply line at both ends — the nut at the shutoff valve and the nut at the fill valve. Have your bucket ready; a small amount of water will drain out.
- Inspect the washers and compression nuts. Look at the rubber washer inside each nut. If it's cracked, flattened, or has a mineral crust on it, that's your culprit. Pop it out and replace it with a matching washer.
- Check the line itself. Run your fingers along the hose. Any stiffness, cracks, or corrosion on the fittings means the whole line should be replaced rather than repaired.
- Reassemble with fresh washers. Thread the nuts hand-tight first to avoid cross-threading, then snug them with a wrench — firm, but stop well short of forcing it. With plastic fittings especially, a little goes a long way; if the fitting feels solid and no water appears when you turn the water back on, you're done.
- Turn the water back on slowly and watch both connection points for a full minute before declaring victory. Dry the fittings with a rag first so a new drip is easy to spot.
When a New Line Makes More Sense Than a Repair
If the hose body is cracked, kinked, or visibly corroded, patching isn't a real option — replace the line. The same goes if the fittings show significant corrosion or if the line is noticeably stiff and brittle. It's good practice to inspect supply lines periodically — especially plastic or older lines — and replace any line that shows stiffness, corrosion, cracking, or has been in service for many years. A replacement hose is inexpensive insurance. Flexible stainless-steel braided lines are a popular upgrade over basic plastic or copper lines because they resist corrosion and handle vibration better; look for a line rated for your home's water pressure — check the psi rating on the line's packaging against your measured household pressure.
When shopping for a replacement, bring the old line to the hardware store or measure the length and note the fitting sizes at each end. Toilet supply lines come in several standard lengths and thread configurations, so matching them before you buy saves a second trip.
A Note on Water Pressure
If your supply line has failed prematurely, or if you've replaced lines more than once in a short span, it's worth checking your home's water pressure with an inexpensive gauge. Consistently high pressure stresses every fitting in the house, not just toilet supply lines. If pressure is running consistently high — many residential systems are designed for roughly 40–80 psi, so a reading well above that range is worth attention — a pressure-reducing valve (PRV) may be worth discussing with a licensed plumber. PRV installation is generally a job for a pro.
For more help with related shutoff and supply valve issues, take a look at our supply line and shutoff valve guides — there's additional detail there on diagnosing angle-stop valve failures, which sometimes masquerade as a supply-line leak.
 Eastman 12 Inch Flexible Toilet Connector, 7/8 Inch Ballcock x 3/8 Inch Compression, Stainless Steel Braided Hose, 48088
View on Amazon →
Eastman 12 Inch Flexible Toilet Connector, 7/8 Inch Ballcock x 3/8 Inch Compression, Stainless Steel Braided Hose, 48088
View on Amazon →
 SharkBite Max 1/2 x 3/8 Inch Compression Angle Stop Valve, Quarter Turn, Push to Connect Brass Plumbing Fitting, PEX Pipe, Copper, CPVC, PE-RT, HDPE, UR23036
View on Amazon →
SharkBite Max 1/2 x 3/8 Inch Compression Angle Stop Valve, Quarter Turn, Push to Connect Brass Plumbing Fitting, PEX Pipe, Copper, CPVC, PE-RT, HDPE, UR23036
View on Amazon →

Still need help? Ask a Plumbing Expert AD
Get a personalized answer from a verified plumbing expert. Describe your issue and get step-by-step help.