
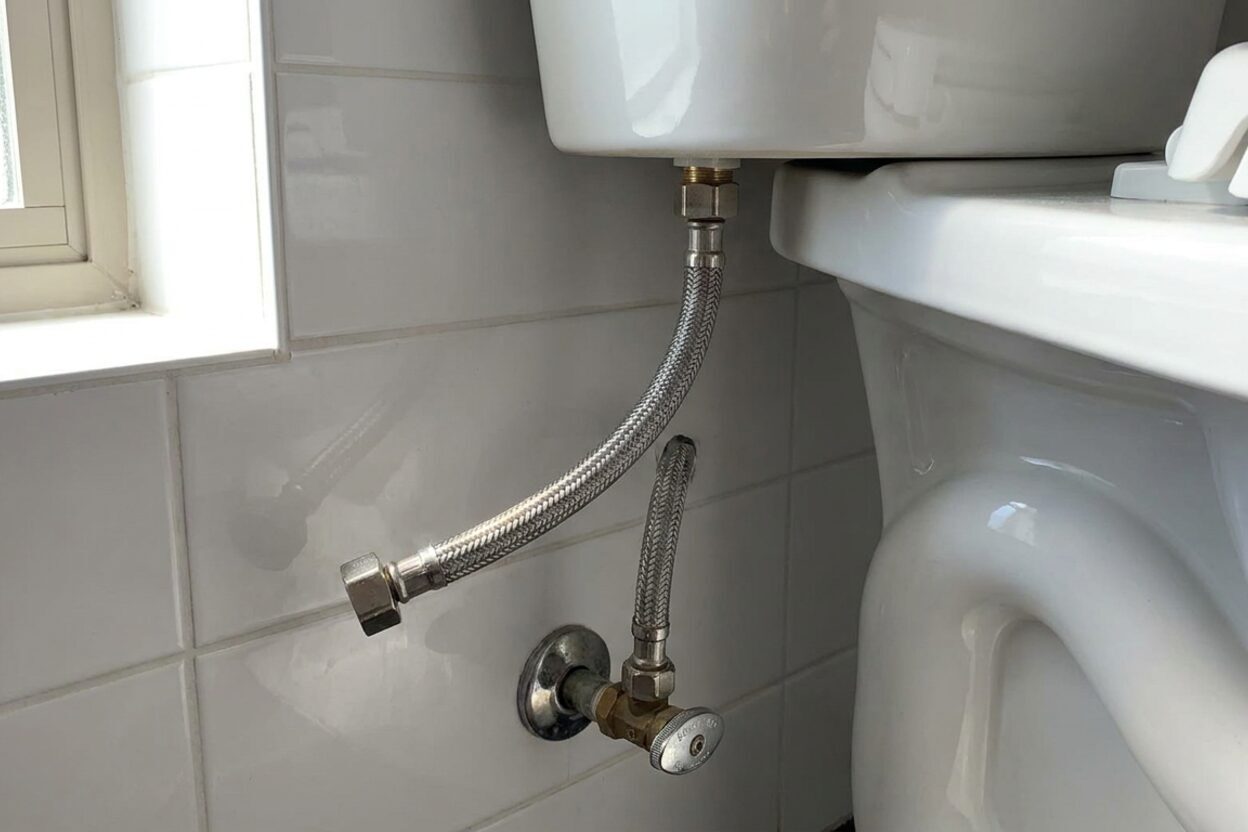
Toilet Shutoff Valve Won't Turn Off? Here's Why

Toilet shutoff valve won't fully stop the water flow
Read full question
Found a slow drip coming from behind the toilet about a month ago — nothing alarming, just a little moisture on the floor that I chalked up to condensation. But it's gotten steadily worse, and now when I try to turn the angle-stop valve fully clockwise to cut the water supply, the flow barely slows down. It's not shutting off the way it should, and I can't tell if the valve is corroded, worn out, or something else entirely.
This is an older home with what looks like original plumbing, and I suspect the hard water here has been doing a number on everything over the years. I've tried cranking the handle as far right as it'll go, but the toilet tank keeps filling like the valve isn't even there. I'd like to figure out whether I can clean or repair the existing valve, or if I need to replace it altogether — and if so, what kind of replacement I should be looking at.
Quick Answer
A toilet shutoff valve that won't stop water flow is almost always caused by mineral buildup on the stem, a damaged internal gasket or seat, or a worn-out gate-type valve that can no longer seal properly. The fix is either cleaning the stem and retightening the bonnet nut, or replacing the whole valve with a modern quarter-turn ball-type valve. Before doing either, locate your home's main water shutoff so you can stop flow upstream while you work.
Why the Valve Keeps Flowing Even When Fully Closed
A toilet shutoff that refuses to stop the water isn't misbehaving randomly — there are a handful of well-defined mechanical reasons it fails, and working through them in order will point you to the right fix. Hard water, as you've suspected, is a very common culprit, but it's not the only one. Here's how to read the symptoms and respond to each scenario.
Scenario 1: The Handle Turns But Water Keeps Running — Likely Mineral or Corrosion Buildup
On older compression-style angle-stop valves, the stem has a rubber seat washer that presses against an internal seat to stop flow. Over time, mineral deposits from hard water can coat the stem threads and seat surface, preventing the washer from seating fully even when the handle is cranked all the way clockwise. The valve feels closed but it isn't.
What to try first:
- Turn the handle fully clockwise and confirm it won't go any further.
- Using an adjustable wrench, fully unthread and remove the bonnet nut (the large hex nut just behind the handle) — the main water supply must be shut off upstream before you do this, as removing the stem with pressure present will release water. Pull the stem out, then use a wire brush or fine steel wool to scrub visible mineral scale off the threads and the end of the stem.
- Reinstall the stem, hand-tighten the bonnet nut, then snug it an additional quarter-turn. Do not overtighten — this can crush the packing and make things worse.
- Turn the handle clockwise again and check whether flow stops.
If cleaning restores the seal, you're done — for now. A valve that has built up this much mineral scale may benefit from proactive replacement the next time you have the water shut off anyway — but if cleaning restores a reliable seal, there is no immediate urgency.
Scenario 2: The Valve Has Been Cleaned but Still Leaks — Damaged Seat or Gasket
If cleaning doesn't restore a tight seal, the rubber washer or internal seat is likely worn, cracked, or pitted from years of use and hard-water exposure. A damaged seat means no amount of stem adjustment will create a proper seal. This is the point where replacement is the more reliable path forward — trying to swap just the washer in an old, corroded body is often more trouble than it's worth and rarely lasts.
Scenario 3: It's an Old Multi-Turn Gate Valve — Replace It
Older homes — and some not so old — may still have gate-type shutoff valves that require several full rotations to open and close. These are notorious for binding after years of sitting fully open — the gate mechanism corrodes in place, and attempting to close it either strips the stem threads or simply can't generate enough pressure to seat the gate. If your valve requires many turns and stiffens or spins loosely before ever stopping the flow, a gate valve failure is the likely diagnosis, and cleaning alone will not fix it.
The standard recommendation from plumbing professionals is to replace gate valves with a modern quarter-turn ball-type valve that uses a simple ball mechanism to stop flow completely with a 90-degree handle turn. These are far more reliable, far less likely to seize, and easy to confirm visually (handle parallel to pipe = open; handle perpendicular = closed).
Before You Do Anything: Stop the Water Upstream
Replacing the Valve: What You'll Need
For most toilets, the supply line connects to a ½-inch compression-outlet angle-stop valve. ½-inch compression-outlet angle-stop valves are common in residential installations, but supply stub-out sizes and fitting types vary. Measure your existing valve and stub-out before purchasing — do not assume the size.
Tools and materials to gather:
- Adjustable wrench (two, ideally — one to hold the supply stub, one to turn fittings)
- Basin wrench or standard wrench (for tight behind-toilet access)
- Bucket and old towels
- Wire brush or steel wool (for cleaning the copper stub-out)
- Replacement quarter-turn ball valve (brass body recommended for longevity; compression-fit, no soldering required for most modern replacements)
- New toilet supply line (replace it while you're in there — braided stainless is a solid choice)
- Thread seal tape (PTFE / Teflon tape) if the new valve has threaded connections
Valve Options Worth Knowing About
The market currently offers three main categories. Basic quarter-turn brass valves are the go-to for straightforward DIY replacement — reliable, code-compliant, and widely available at hardware stores. Higher-grade stainless-body ball valves offer better corrosion resistance, worth considering if your water is particularly hard — check the manufacturer's spec sheet for flow and pressure ratings. For homeowners interested in leak prevention, smart electronic shutoff units combine a quarter-turn actuator with flow sensors and app-controlled shutoff — they carry manufacturer-rated pressure ratings and connect via various wireless protocols — check the spec sheet for the unit you're considering, as ratings and battery life vary by model. These sit at a higher price point but integrate with whole-home leak-detection systems.
For most situations, a standard brass quarter-turn valve is all you need. See our guides on supply lines and shutoff valves for more on choosing and fitting the right valve for your setup.
When to Call a Plumber Instead
Most angle-stop valve replacements are within reach of a confident DIYer. However, call a licensed plumber if: the copper stub-out coming out of the wall is corroded, pinhole-damaged, or crumbles when you try to work on it; the valve is soldered directly to copper pipe and you're not comfortable with a torch; or the shutoff is in an awkward location that makes a compression fitting impossible to seat properly. Working on a damaged stub-out without the right skills can turn a valve swap into a wall-open pipe repair quickly.
 Eastman 12 Inch Flexible Toilet Connector, 7/8 Inch Ballcock x 3/8 Inch Compression, Stainless Steel Braided Hose, 48088
View on Amazon →
Eastman 12 Inch Flexible Toilet Connector, 7/8 Inch Ballcock x 3/8 Inch Compression, Stainless Steel Braided Hose, 48088
View on Amazon →
 SharkBite Max 1/2 x 3/8 Inch Compression Angle Stop Valve, Quarter Turn, Push to Connect Brass Plumbing Fitting, PEX Pipe, Copper, CPVC, PE-RT, HDPE, UR23036
View on Amazon →
SharkBite Max 1/2 x 3/8 Inch Compression Angle Stop Valve, Quarter Turn, Push to Connect Brass Plumbing Fitting, PEX Pipe, Copper, CPVC, PE-RT, HDPE, UR23036
View on Amazon →

Still need help? Ask a Plumbing Expert AD
Get a personalized answer from a verified plumbing expert. Describe your issue and get step-by-step help.