
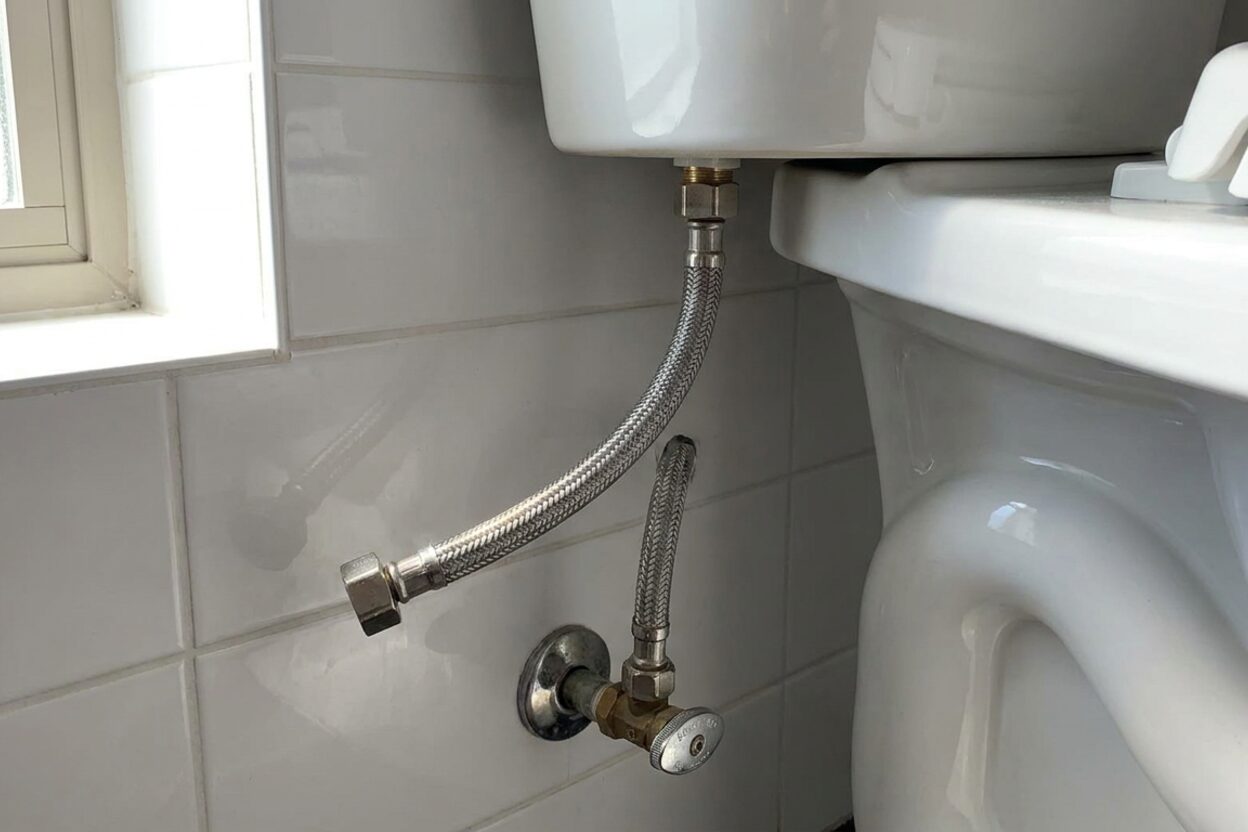
Toilet Supply Line Dripping at Connection Fix

Why is my toilet supply line dripping where it connects?
Read full question
Nobody wants to spot this, but looking at the base of my toilet tank right now and there's a slow, steady drip forming right at the point where the supply line screws into the bottom of the tank — there's already a small damp patch on the floor underneath it. The connection itself looks intact, nothing is visibly cracked or broken, but there's clearly moisture weeping out from around that plastic nut every time the tank refills. I've gone ahead and snugged the nut a little tighter by hand but the drip came right back once the water pressure kicked in again. Is this something wrong with the nut itself, or is there a washer or seal inside that I need to replace? I'd really like to fix this without pulling the whole line off if I can help it.
Quick Answer
A dripping toilet supply line connection is almost always caused by a worn or missing rubber washer inside the tank-side nut, or by under- or over-tightening. Replacing the flat washer and snugging the nut — hand-tight plus a firm quarter-turn — usually stops the leak without replacing the whole line. If the hose or fittings show corrosion or cracking, swap in a new flexible braided line.
The Real Culprit Isn't the Nut — It's Usually What's Inside It
There's a widespread assumption that a dripping supply-line connection just needs to be cranked tighter. In reality, over-tightening is just as likely to cause a leak as under-tightening — and it can strip the threads or deform the very washer you're trying to compress. The actual fix almost always lives inside that plastic or metal nut: a small flat rubber washer or O-ring that's either dried out, gone missing, or been crushed into uselessness over time. Once you know to look there, the repair becomes straightforward.
Before You Touch Anything — Shut the Water Off
This step isn't optional. Locate the angle-stop (shut-off) valve on the wall or floor directly behind the toilet and turn it clockwise until it stops. Then flush the toilet to drain the tank. This eliminates water pressure while you work and keeps things from getting unexpectedly wet. If the shut-off valve itself feels stiff, corroded, or won't close fully, that's a separate issue worth addressing — but for now, just confirm the tank stops refilling after you flush.
Start With a Simple Tighten — But Do It Right
With the water off and the tank empty, grip the supply-line nut at the tank connection and try to turn it clockwise. If it moves noticeably, it was loose. Bring it to hand-tight first, then use an adjustable wrench or channel-lock pliers to give it one firm quarter-turn beyond that — no more. That's the target: snug, not strained. Porcelain tank inlets are not designed for heavy torque — the quarter-turn past hand-tight is genuinely sufficient, and forcing it further risks cracking the fitting or stripping a plastic nut. Slowly reopen the shut-off valve and watch the joint for a full minute. If it's dry, you're done.
If It Still Drips — Inspect the Washer
Turn the water back off, drain the tank again, then fully unscrew the supply-line nut from the tank inlet. Look inside the nut. You should find a flat rubber washer seated against the fitting. Common problems:
- Washer missing entirely — it may have fallen off during a previous repair, or simply deteriorated away.
- Washer cracked, flattened, or deformed — rubber degrades with age, water chemistry, and cleaning products, leaving it unable to form a seal.
- Wrong size or type — the washer size varies by fitting and manufacturer — a flat rubber washer or matching silicone O-ring is typical, but measure yours or take the old one to the hardware store to get the right fit.
Take the old washer to a hardware store to match it, or pick up an assortment pack of flat rubber washers in the plumbing aisle — they're inexpensive and widely available. Seat the new washer firmly inside the nut, thread the connection back onto the tank inlet by hand first to avoid cross-threading, then snug it with your wrench (that same quarter-turn past hand-tight). Note: PTFE tape is most useful on tapered NPT-threaded connections. The tank-side supply nut seals against a flat washer face rather than threads, so a properly seated new washer is the correct fix — tape is generally unnecessary there and is not a substitute for a good washer.
A Note on the Valve-Side Connection
The supply line connects at both ends: the tank and the shut-off valve. If tightening and re-washering the tank side doesn't stop the drip, check whether moisture is actually originating at the valve end. That connection typically uses a compression fitting or a similarly small rubber seal, and the same logic applies — snug-but-not-stripped, with a good washer in place.
When It's Time to Replace the Whole Line
If the hose body itself feels stiff, shows visible corrosion or mineral buildup, has any cracks or bulges, or the fittings are corroded to the point where the washer can no longer seat flat — replace the line. This is also the right call if the line is the older chrome-ribbed rigid style, which is prone to cracking at bends over time.
Modern flexible braided stainless-steel supply lines are the standard replacement choice in established plumbing practice. They're durable, come pre-fitted with built-in rubber washers at both ends, and are widely available. Measure the distance from your shut-off valve outlet to the tank inlet before purchasing — lines come in a wide range of lengths (commonly 9 to 36 inches or more), and you want one that reaches without forcing a bend or kinking. PVC reinforced flex lines and copper-compression lines are also available and work well in most residential applications.
Installation is the same process: hand-tighten both nuts, then a final snug quarter-turn with a wrench. No special tools needed beyond a pair of pliers or an adjustable wrench. For more guidance on supply valve repairs alongside the line, see our supply line and shutoff valve repair questions.
After the Fix — A Quick Leak Check
Once everything is reassembled, open the shut-off valve slowly — letting pressure build gradually reduces stress on new washers. Watch both connection points for at least a minute as the tank fills. Dry? Run your finger around each fitting and check again after a full flush cycle. A small drip can hide until the line is under full pressure and flexing slightly from water flow.
If the connection drips again after a correctly-installed new washer and proper tightening, the tank inlet port itself may be chipped or deformed — preventing a flat seal from forming. At that point, the repair moves beyond a simple washer swap and a plumber's assessment is the sensible next step.
 Eastman 12 Inch Flexible Toilet Connector, 7/8 Inch Ballcock x 3/8 Inch Compression, Stainless Steel Braided Hose, 48088
View on Amazon →
Eastman 12 Inch Flexible Toilet Connector, 7/8 Inch Ballcock x 3/8 Inch Compression, Stainless Steel Braided Hose, 48088
View on Amazon →
 SharkBite Max 1/2 x 3/8 Inch Compression Angle Stop Valve, Quarter Turn, Push to Connect Brass Plumbing Fitting, PEX Pipe, Copper, CPVC, PE-RT, HDPE, UR23036
View on Amazon →
SharkBite Max 1/2 x 3/8 Inch Compression Angle Stop Valve, Quarter Turn, Push to Connect Brass Plumbing Fitting, PEX Pipe, Copper, CPVC, PE-RT, HDPE, UR23036
View on Amazon →

Still need help? Ask a Plumbing Expert AD
Get a personalized answer from a verified plumbing expert. Describe your issue and get step-by-step help.