
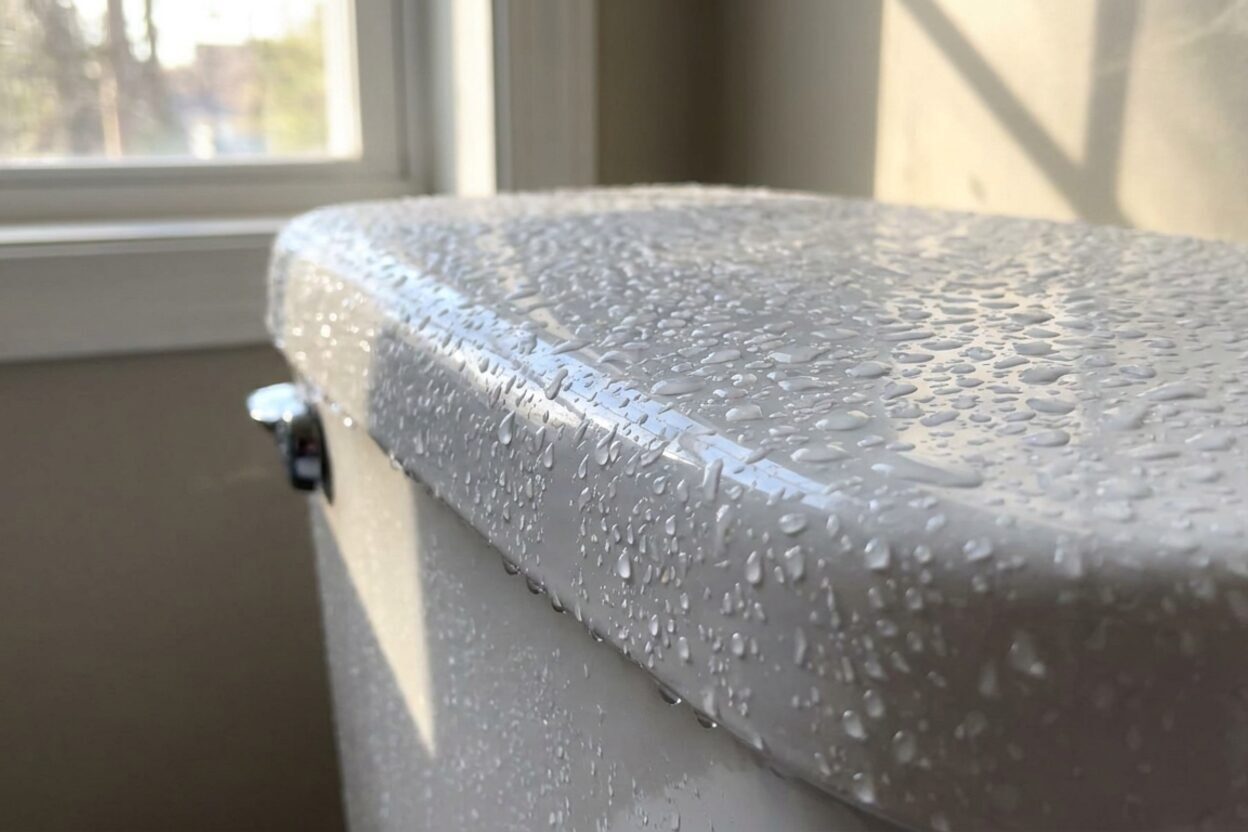
Why Is My Toilet Tank Sweating? Causes & Fixes

Why does my toilet tank get all wet and dripping?
Read full question
Nobody can seem to give me a straight answer on this. My neighbor says it's a leak from the tank bolts, the guy at the hardware store told me I need some kind of anti-sweat valve, and every YouTube video I watched went in a completely different direction. All I know is that every summer morning I walk into the bathroom and the outside of my toilet tank is dripping wet — there's even a puddle forming on the floor around the base. At first I thought the toilet was leaking, but I wiped the tank dry and the water came back without even flushing it.
I've got an older home and the bathroom doesn't have great airflow. I'm not sure if that matters. Is this actually condensation, or could it be a slow leak I'm missing? And more importantly, what do I actually do about it — is this a serious problem or just annoying?
Quick Answer
Toilet tank sweating is condensation — warm, humid air hitting the cold porcelain causes moisture to form on the outside, just like a cold glass of water on a summer day. It's not a plumbing leak, but it can damage flooring over time. Improving ventilation, insulating the tank interior, or installing an anti-sweat valve are the main solutions.
It's Not a Leak — It's Your Bathroom's Weather
The confusion is completely understandable, and your neighbor, the hardware store, and YouTube are all partly right — they're just describing different pieces of the same puzzle. What you're dealing with is condensation, sometimes called tank sweat, and it has everything to do with the season and the conditions in your bathroom rather than a broken seal or a faulty valve.
Here's the basic physics: the water sitting inside your toilet tank comes from the supply line and stays quite cold — often noticeably colder than room temperature. When warm, humid summer air makes contact with that cold porcelain surface, moisture in the air condenses on the outside of the tank, drips down, and pools on the floor. It's the exact same process that fogs up a bathroom mirror or beads up on a cold drink. No water is escaping from the plumbing — it's forming on the outside from the air around it.
How to Confirm It's Condensation (and Not an Actual Leak)
Before committing to any fix, it's worth a quick check to make sure you're not dealing with a slow drip from the tank bolts, the supply line connection, or the tank-to-bowl gasket. Those are real leaks that need different repairs. Here's how to tell them apart:
- Dry the tank completely with a towel, then don't flush for 15–20 minutes. If moisture reappears without a flush, and especially on a warm humid day, that points strongly to condensation rather than a plumbing leak.
- Check where the water comes from. Condensation shows up evenly across the outside of the tank — mostly the sides and bottom. A tank bolt leak will drip from the underside of the tank near the bolts. A supply line drip comes from the connection at the bottom or side.
- Note the season and time of day. Condensation is almost always worst in summer, in the morning before the house warms up, or right after a long hot shower. If the problem disappears in cooler, drier months, condensation is almost certainly the cause.
If after checking those points you're still unsure, slip a piece of dry tissue paper around each bolt and the supply line fitting and leave it for a while. If the tissue stays dry in those spots but the tank surface is still wet, you have condensation, not a leak.
Why Humidity and Season Make It So Much Worse
Tank sweating is a summertime problem for most households — or year-round in climates that are consistently warm and humid. A few factors make it worse:
- High indoor humidity. If your bathroom lacks a working exhaust fan, or if the fan isn't used after showers, moisture builds up in the air and the tank becomes a collection point for it.
- Cold incoming water. In summer in most climates, municipal supply water remains noticeably cooler than air temperature — the bigger that gap, the more condensation forms. In very warm regions, this differential may be smaller.
- Older homes with poor ventilation. An older bathroom without a properly sized exhaust fan — or any fan at all — is particularly prone to this.
- Long humid stretches. A run of hot, muggy days without a break means the tank never really dries out between uses.
The Real Reason It Matters
Tank sweating is easy to dismiss as just annoying, but persistent, unaddressed moisture can eventually affect subflooring or grout over time — worth fixing rather than mopping up indefinitely. The good news is that the fixes are genuinely manageable for most homeowners.
Your Practical Options
1. Improve Bathroom Ventilation First
This is the free fix and often the most impactful one. Run your bathroom exhaust fan during and for at least 15–20 minutes after every shower. If your bathroom doesn't have a functioning exhaust fan, that's worth addressing — a properly sized fan (generally rated in CFM relative to your bathroom's square footage and layout — check the fan manufacturer's sizing guide for your specific space) reduces ambient humidity significantly and makes a real difference not just for tank sweating but for overall bathroom health.
2. Insulate the Inside of the Tank
This is the most common DIY fix. Foam tank liner kits are widely available at hardware and home improvement stores. The liner installs inside the tank and acts as a thermal barrier between the cold water and the porcelain walls, so the outside surface stays closer to room temperature and condensation doesn't form as easily.
Basic steps:
- Turn off the water supply at the shutoff valve (angle stop) behind or beside the toilet.
- Flush to empty the tank, then sponge out any remaining water — the inside must be completely dry for the adhesive to bond properly.
- Allow the tank interior to air dry thoroughly (this may take a few hours).
- Cut the foam panels to fit and apply them to the interior walls and bottom of the tank according to the kit instructions.
- Allow the adhesive to cure fully before turning the water back on — check the kit's instructions for curing time.
This approach works well and is inexpensive. The one limitation is that if your tank interior has an unusual shape or a lot of components in the way, fitting the liner panels neatly can take some patience.
3. Install an Anti-Sweat Valve (Tempering Valve)
This is what the hardware store employee was pointing you toward, and it's the more permanent solution — particularly for chronic sweating problems. An anti-sweat valve (also called a tempering valve or mixing valve) installs on the supply line and blends a small amount of hot water into the cold supply going into the tank. This raises the tank water temperature just enough to reduce the temperature gap with the room air, which dramatically cuts condensation.
Installation requires working with your supply line and may involve soldering or push-fit connections depending on your plumbing configuration. If soldering is required, ensure the area is well-ventilated, keep a damp cloth nearby, and protect adjacent surfaces from heat — or use push-fit (e.g., SharkBite-style) fittings to avoid an open flame entirely. If you're comfortable with basic supply line work, this is a medium-difficulty DIY project. If not, a plumber can install one quickly. Check our tank problems section for more guidance on tank-related repairs, or browse our toilet repair guides for broader how-to coverage.
4. A Dehumidifier as a Stopgap
If your bathroom is part of a larger space or you're not ready to tackle the other fixes, a portable dehumidifier can reduce ambient moisture enough to minimize sweating during the worst humid stretches. It's not a permanent solution but it can protect your floor while you work out the right long-term fix.
Tools and Materials You May Need
- Towels or rags (for drying the tank)
- Sponge or turkey baster (for emptying the tank)
- Foam tank liner kit (for the insulation approach)
- Scissors or utility knife (to trim foam panels)
- Anti-sweat mixing valve and compatible supply line fittings (if going that route)
- Adjustable wrench or basin wrench (for supply line work)
- Bucket (to catch any residual water)
Bottom Line
Your neighbor, the hardware store, and YouTube were each telling you about a different piece of the solution — not contradicting each other as much as it seemed. Better ventilation, a foam liner, and an anti-sweat valve are all legitimate fixes; which one you need depends on how severe the sweating is and how much of a permanent solution you want. Start with ventilation improvement since it costs nothing, and if the problem persists through the humid season, a foam liner kit is the logical next step.

Still need help? Ask a Plumbing Expert AD
Get a personalized answer from a verified plumbing expert. Describe your issue and get step-by-step help.