
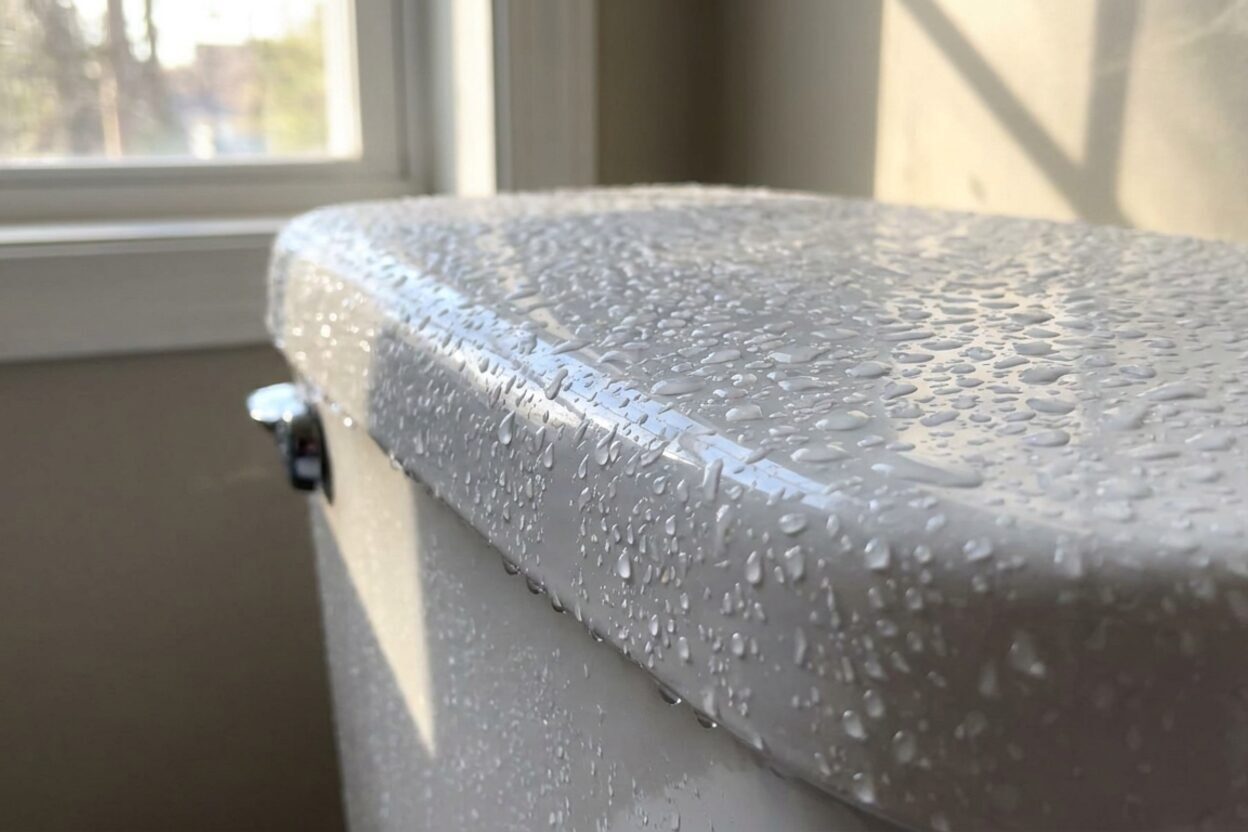
How to Stop a Sweating Toilet Tank

Why Is My Toilet Tank Dripping Water on the Outside?
Read full question
My toilet tank is doing something strange — it's constantly wet and dripping on the outside, even though I can't find any cracks or loose connections. At first I thought it was a slow leak from somewhere, but when I dry it off with a towel the moisture just comes right back within an hour or so, even without anyone flushing it. The floor around the base of the toilet is starting to feel damp too, which has me worried.
The toilet came with the house when we bought it a few months back, so I don't know its full history. A neighbor mentioned it might just be 'sweating' but I'm not sure what that means or if it's actually something I need to fix. Is this a real problem and what's causing it?
Quick Answer
Toilet tank 'sweating' is condensation — warm, humid air hitting the cold porcelain surface causes moisture to form on the outside of the tank, just like a cold glass on a summer day. It's not a plumbing leak, but it can still damage floors and subfloor over time. Fixes range from improving ventilation to installing a toilet tank liner or an anti-sweat mixing valve.
Before Anything Else: Is It Really Condensation?
The good news is that what you're describing — moisture reappearing on a dry tank within an hour, not tied to a specific flush — is a classic sign of condensation rather than a plumbing leak. That's an important distinction, and it's worth taking a moment to confirm it before doing anything else.
A true plumbing leak tends to show up in specific spots: at the supply line connection on the side of the tank, at the tank bolts on the underside, or around the tank-to-bowl gasket. Condensation, on the other hand, shows up as an even film or steady dripping across the whole outer surface of the tank. You can dry the tank completely, then watch where moisture first reappears — if it's spread evenly across the porcelain rather than forming at a joint or fitting, condensation is almost certainly the culprit.
That said, it's worth ruling out a slow tank-bolt or supply-line drip first, because those are simple to tighten and can mimic condensation in certain conditions. Check those connections while the tank is dry and look for any mineral deposits or discoloration that would suggest a chronic slow drip from a specific point.
Why This Happens — and Why It Can Still Cause Damage
Cold water constantly enters your toilet tank from the supply line. Porcelain conducts that cold temperature to the outer surface. When warm, humid air in the bathroom contacts the cold tank surface, moisture in the air condenses — the exact same physics that makes a cold drink glass sweat on a humid day. The tank itself is working perfectly; this is purely a temperature and humidity interaction.
It's common in homes during warm, humid months, in bathrooms with poor ventilation, or anywhere the cold water supply temperature is significantly lower than the ambient air. It can also be worse in homes with high indoor humidity year-round.
While it isn't a plumbing failure, it is worth addressing. Left unaddressed for a long time, persistent moisture on the floor can soften grout, damage a wood subfloor, or in poorly ventilated bathrooms eventually contribute to mold — so it's worth solving, but it isn't an emergency. Most households have time to try the straightforward fixes below before any serious damage occurs.
Safety Considerations First
- Slip hazard: A consistently wet bathroom floor is a fall risk. Keep the area dry while you work toward a permanent fix, and address it promptly.
- Subfloor damage: Before assuming condensation is harmless, check that the floor directly around and beneath the toilet base is still firm. Press on it — a soft or spongy feel suggests moisture has already gotten into the subfloor and a flooring professional should assess it.
- Mold check: Look behind the toilet and at the base of the wall. If you see discoloration or smell mustiness, you may already have a mold issue that needs remediation before you seal anything up.
- Electrical awareness: If your bathroom has a GFCI outlet near the toilet (common with bidets or washlets), keep it away from dripping water while you work.
The Fix Options — From Simple to More Involved
Option 1: Improve Bathroom Ventilation (Start Here)
This is the lowest-effort first step. If your bathroom has an exhaust fan, make sure it's actually being used during and after showers — running it for at least 15–20 minutes after bathing is a commonly cited guideline and makes a real difference in many bathrooms — adjust based on your fan's capacity and how quickly humidity clears. If the fan is undersized, noisy, or barely moves air, it may not be doing much. Check that the duct vents to the outside (not just into the attic). Improving ventilation won't eliminate condensation in severe cases, but it often reduces it meaningfully and costs nothing.
Option 2: Install a Toilet Tank Liner Kit
This is the most common DIY fix and works well in most households. A tank liner kit consists of foam insulation panels that you cut to fit and adhere to the inside walls of the tank. The foam creates a thermal barrier so the outside surface of the tank never gets as cold as the water inside.
What you'll need: Tank liner kit (available at hardware stores — most are universal and can be trimmed to fit), scissors or a utility knife, waterproof adhesive (usually included), sponge, and dry towels.
- Turn off the water supply at the shutoff valve (angle stop) behind or beside the toilet.
- Flush to empty the tank, then sponge out the remaining water at the bottom completely — the liner adhesive won't bond to a wet surface.
- Let the interior dry thoroughly. Drying time varies depending on humidity and tank size — follow the kit manufacturer's instructions, and when in doubt, give it more time rather than less. A fan directed into the open tank speeds the process.
- Cut the foam panels to fit each interior wall of the tank, working around the flush valve and fill valve hardware.
- Apply adhesive per the kit instructions and press panels firmly in place.
- Allow the full cure time specified by the manufacturer before turning the water back on — don't rush this step.
Once cured and refilled, the tank's outer surface should stay much closer to room temperature, stopping or dramatically reducing condensation.
Option 3: Anti-Sweat (Tempering) Valve
For homes with very cold water supply temperatures or persistent condensation that a liner doesn't fully solve, a tempering valve (also called an anti-sweat valve) is the more robust solution. This device is installed on the supply line and mixes a small amount of hot water into the cold water entering the tank, raising it just enough to prevent the tank surface from dropping below the dew point of the room air.
Installation involves working with both the hot and cold supply lines and is within reach of a confident DIYer, but if you're not comfortable with supply line work, a plumber can do this quickly. Check your local plumbing code — requirements for mixing valves vary by jurisdiction, so it's worth confirming what's allowed or required in your area before purchasing a valve. You can find more guidance in our tank problems category.
Option 4: Reduce Indoor Humidity
If condensation affects multiple surfaces in your home — not just the toilet — a whole-home or bathroom dehumidifier may be the most practical long-term answer. This is especially worth considering in humid climates or in homes without central air conditioning.
Tools and Materials Summary
- Dry towels and a sponge
- Tank liner foam kit (for Option 2)
- Scissors or utility knife
- Tempering/anti-sweat valve and appropriate fittings (for Option 3)
- Adjustable wrench or pliers (if adjusting supply line)
- Exhaust fan (if upgrading ventilation)
When to Call a Plumber
Condensation itself is a DIY-friendly problem. But if you find the subfloor is soft, if mold is present behind the wall, or if after ruling out condensation you discover an actual slow leak you can't trace to a specific connection, those are good reasons to bring in a licensed plumber. A cracked tank is also a call-a-plumber situation — porcelain cracks cannot be reliably patched and the tank would need replacement.

Still need help? Ask a Plumbing Expert AD
Get a personalized answer from a verified plumbing expert. Describe your issue and get step-by-step help.