
How to Replace a Toilet Flapper (Step-by-Step)

Got quoted a lot to fix my running toilet — can I swap the flapper myself?
Read full question
Three weeks ago my toilet started running constantly, and I finally called a plumber to take a look. The quote he gave me felt really steep for what sounds like a pretty minor repair, so now I'm wondering if swapping the flapper is something I can actually handle on my own without making things worse.
I've peeked inside the tank and the rubber flapper piece looks worn and kind of warped — I'm guessing that's the culprit. I just want to make sure I know exactly what I'm doing before I go buy a part and start pulling things apart. What's the process for getting the old one off and putting a new one in correctly?
Quick Answer
Replacing a toilet flapper is one of the most beginner-friendly plumbing repairs you can do — no special tools required. You'll shut off the water supply, drain the tank, swap the old flapper for a new one, adjust the chain, and test. The whole job typically takes around 30 minutes.
Good News: This One's Really DIY-Friendly
A worn flapper is one of the most common reasons a toilet runs nonstop, and replacing it is genuinely one of those repairs that requires zero plumbing experience. If you can follow a few straightforward steps, you'll have this sorted before lunch. Let me walk you through the whole thing.
What You'll Need Before You Start
Pick up a replacement flapper at any hardware or home improvement store. Most toilets use either a 2-inch or 3-inch flush valve — flush valve size varies by manufacturer and model, so it's worth pulling the old flapper off first (or noting your toilet's brand and model from inside the tank lid) so you grab the right size. Brands like Fluidmaster and Korky both make adjustable universal flappers that fit a wide range of toilets, including modern low-flow models, so those are a safe bet if you're not sure.
- Replacement flapper (match to your flush valve size — 2" or 3")
- Old towel or sponge
- Small bucket
- Rag or cloth for cleaning the valve seat
That's honestly it. No wrenches, no specialty tools.
Step One: Shut Off the Water and Empty the Tank
This is the most important step, so don't skip it. Find the shutoff valve (also called the angle stop or stop valve) on the wall or floor behind the toilet, and turn it clockwise until it stops. Then flush the toilet and hold the handle down to push as much water out of the tank as possible. Once the tank is mostly empty, use a sponge or old towel to soak up the inch or so of water that remains at the bottom — working dry makes everything easier and cleaner.
Go ahead and set the tank lid somewhere safe. Porcelain cracks easily if it gets knocked off a counter.
Getting the Old Flapper Off
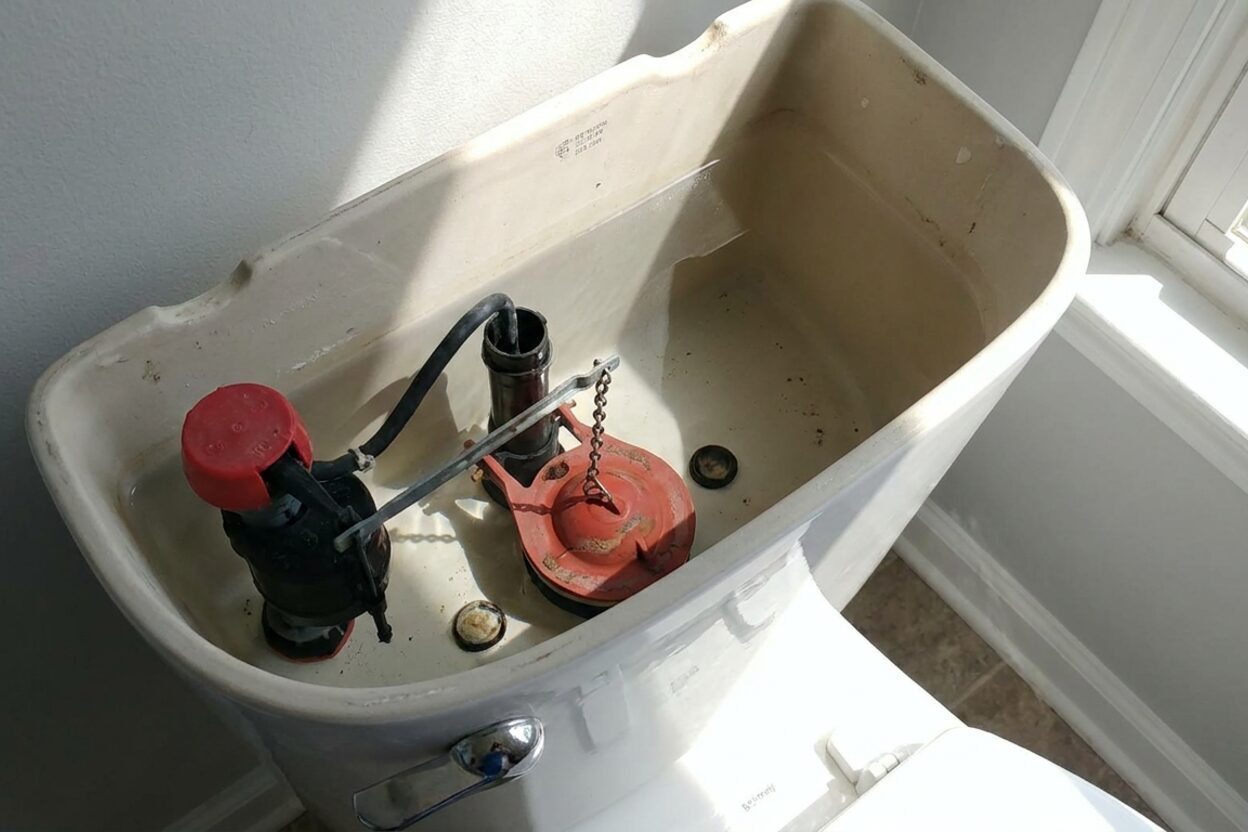
Look at the flush handle arm inside the tank — there's a small chain connecting it to the flapper. Unhook or unclip that chain from the arm. Now look at how the flapper is attached to the overflow tube (the tall tube in the center of the tank):
- Ear-style flappers have two small tabs (ears) that snap onto side pegs on the overflow tube. Pinch or pull them off the pegs.
- Ring-style flappers have a circular collar that slides over the overflow tube itself. Just lift it straight up and off.
Once the old flapper is free, take a cloth and wipe down the flush valve seat — the ring the flapper rests against to create a seal. Mineral buildup here is common, especially in areas with hard water, and it's often what causes a flapper to leak even when it looks fine. If the buildup is stubborn, a little fine-grit emery cloth can help smooth the surface. Don't skip this; a clean seat is what gives the new flapper a proper seal.
Putting the New Flapper In
Installing the new flapper is basically the reverse of removal. If it's ear-style, snap the ears onto the side pegs — you should feel or hear them click into place. If it's ring-style, slide the collar down over the overflow tube until it sits flush. Either way, make sure the flapper is centered and lying flat over the valve opening.
Now reconnect the chain to the flush handle arm. This part matters more than most people realize: aim for a small amount of slack — just enough that the chain has a slight droop when the flapper is closed, without so much that it can bunch up under the flapper. Adjust by a link or two at a time until flushes feel complete and the flapper seats fully after each flush. Too tight, and the flapper won't seal properly after a flush (hello, running toilet). Too loose, and the flapper won't lift high enough to give you a full flush.
Testing the Repair
Turn the shutoff valve back on (counter-clockwise) and let the tank fill. While it's filling, check that the water level rises to just below the top of the overflow tube — if it's going over, you may have a separate fill valve issue worth looking into. Once the tank is full, do a test flush and watch what happens: the flapper should lift cleanly, allow the tank to drain, and then drop back down and seat flat with no water continuing to trickle. If you can still hear water running after the tank fills, try adjusting the chain by a link or two in either direction.
Still hearing water after adjusting the chain? Run your hand along the flush valve seat again — if it feels rough or pitted, that surface damage might mean the valve seat itself needs attention. A significantly damaged or pitted valve seat may require replacing the entire flush valve — if you're not comfortable with that repair, it's worth consulting a licensed plumber. For more on flush valve problems, check out our guides on fill and flush valve issues.
A Quick Note on Flapper Lifespan
Flappers are made of rubber, which degrades over time. How quickly depends on your water chemistry, how often the toilet is used, and whether any in-tank drop-in bleach tablets have been used. Those tablets are hard on rubber and can accelerate wear significantly, so it's worth avoiding them. If your flapper keeps failing sooner than expected, that's a good clue to look at what's going into the tank.
All things considered, this is a repair most homeowners can handle confidently on a weekend afternoon. And if you find yourself dealing with ongoing running-toilet issues even after the flapper is replaced, our toilet repair guides cover the other usual suspects like fill valves and float adjustments.

Still need help? Ask a Plumbing Expert AD
Get a personalized answer from a verified plumbing expert. Describe your issue and get step-by-step help.