
How to Stop a Running Toilet for Good

My toilet keeps running again — third time this season!
Read full question
Three times now I've come home to that maddening hissing sound coming from the bathroom, and I'm completely over it. It's the same toilet in the main bath, and every time I jiggle the handle it stops for a while — but within a few days the running starts up again. I replaced the flapper myself last month thinking that would fix it for good, but here we are.
As a first-time homeowner I'm trying to handle as much of this myself as possible, but I honestly don't know if I'm just buying the wrong parts or if there's a bigger issue hiding inside the tank. The toilet is probably original to the house, so it's not brand new. Is there a systematic way to actually diagnose what's causing this so I can fix it once and for all instead of slapping a bandage on it every few weeks?
Quick Answer
A running toilet almost always comes down to three culprits: a worn flapper that won't seal, a misadjusted or failing fill valve, or a float set too high. Tackle them in that order — flapper first, then fill valve, then float — and you can usually stop the run for good in under an hour without calling a plumber.
Stop the Water Waste Right Now
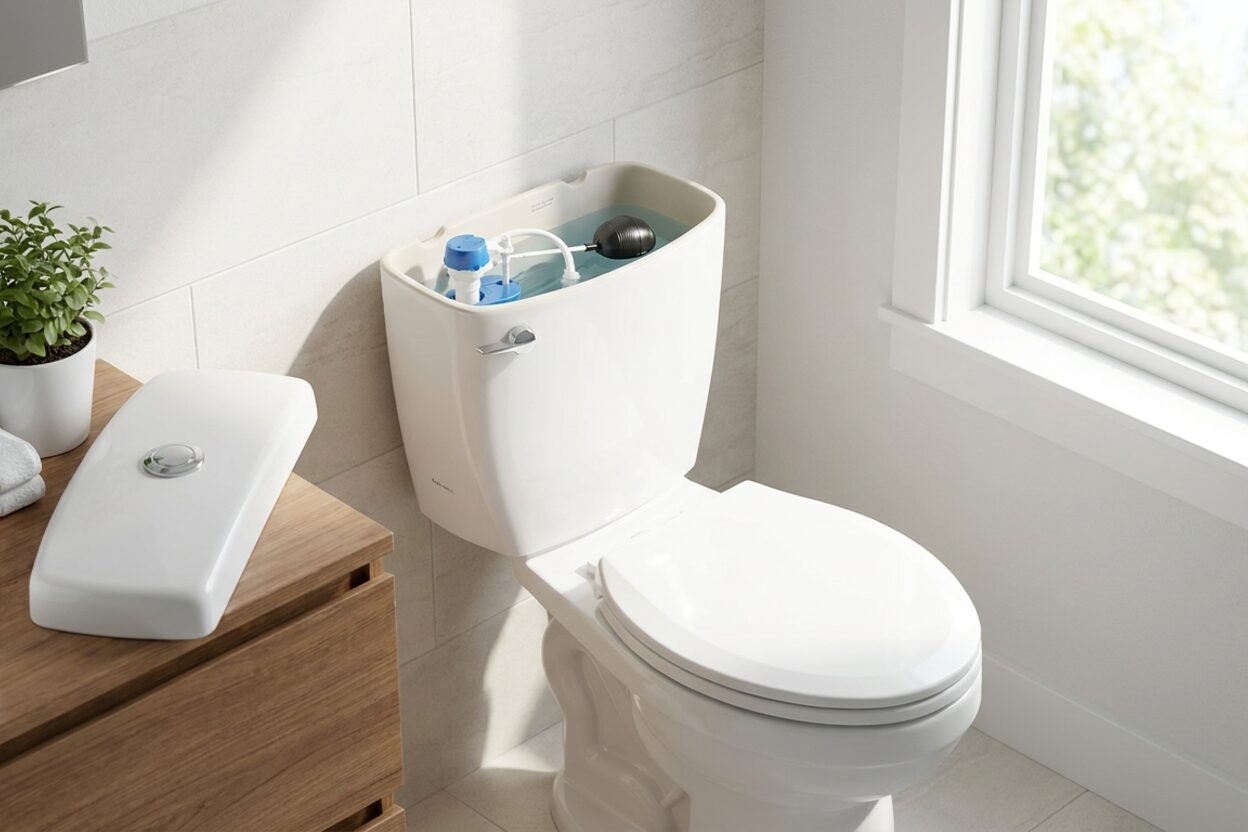
Before anything else, take thirty seconds to confirm water is actually running into the bowl and not just making noise. Lift the tank lid and watch. If you see water trickling over the top of the overflow tube (the tall open pipe in the center of the tank), the float is set too high and water is spilling straight into the bowl — that's your immediate problem. If the water level is below the overflow tube but you can still hear or see a trickle, a leaking flapper is almost certainly to blame.
Quick stop-gap: Turn the shutoff valve (the oval handle on the wall behind the toilet) clockwise until it's snug. This kills the water supply completely. Nothing is damaged by doing this — it just stops the waste while you work. Flush once to empty the tank, then sponge out the last inch or two of water so you can work without getting soaked.
The Three Most Likely Culprits — In Order of Probability
1. The Flapper (Start Here)
The flapper is the rubber disc at the bottom of the tank that lifts when you flush and drops back down to let the tank refill. Even a flapper you installed a month ago can fail fast if your water contains chloramines or if you use in-tank cleaning tablets — both are hard on rubber. A flapper that looks fine can still be warped or have mineral buildup on its seat that prevents a full seal.
To test it: dry your hand and press down firmly on the flapper while the tank is full and the toilet is running. If the running stops immediately, the flapper isn't sealing. Also check the chain — if it's too long it can get pinched under the flapper, leaving a tiny gap. Trim or re-hook it so there's just enough slack to let the flapper seat fully but not so much that it coils underneath.
Flappers come in different seat sizes — 2-inch is most common, but 3-inch and proprietary sizes exist. Bring the old flapper to the hardware store or note your toilet brand and model to confirm the correct fit before buying. Installation takes about five minutes: unhook the old one from the overflow tube ears, snap the new one on, reconnect the chain, and you're done.
2. The Fill Valve
If a new flapper didn't solve it — or if the running comes back quickly — the fill valve is the next suspect. This is the taller assembly on the left side of the tank. Its job is to refill the tank after a flush and then shut off completely. When the internal seals inside a fill valve wear out, it never fully closes, leaving water trickling in constantly. You can sometimes hear a faint hiss even when the tank appears full.
Many fill valves are adjustable and fit a wide range of toilets, but note your toilet brand and tank dimensions before buying — some low-profile or manufacturer-specific tanks have height or inlet restrictions that limit compatibility. Check the replacement valve's listed height range against your tank depth. Replacing one is a medium-effort DIY job — you'll turn off the supply, flush, sponge the tank dry, disconnect the supply line underneath, unscrew the locknut, and swap the whole assembly. Fill valve replacement is one of the most common repairs homeowners do themselves, and the new valve usually comes with clear instructions.
3. The Float Height
If water is spilling over the top of the overflow tube, your float is set too high. On older brass ball-cock valves, you can gently bend the float arm downward to lower the water level; on plastic arms, bending can crack the arm — instead look for an adjustment screw or clip at the pivot point, or replace the valve if no adjustment is available. On modern fill valves there's typically a twist-adjust collar or a clip on the side of the valve body. The water level should sit about an inch below the top of the overflow tube. Adjust, flush, and watch it refill to confirm.
Note: if you are also adjusting the height of the fill valve itself, make sure the valve's critical-level (CL) mark — usually a line or arrow molded on the side of the valve body — sits at least one inch ABOVE the top of the overflow tube. The CL mark must be above the overflow tube even though the water surface sits below it; this separation is what prevents tank water from back-siphoning into the supply line. Check your valve's instructions to confirm the required clearance.
What You'll Need
- Replacement flapper (matched to your toilet brand/size)
- Replacement fill valve (if the flapper swap doesn't hold)
- Adjustable pliers or channel-lock pliers
- Sponge and a small bucket
- Towels for the floor
- Food coloring (optional — a few drops in the tank to confirm a flapper leak visually)
A Pattern of Running Means Something Specific
The fact that jiggling the handle stops the running temporarily is an important clue — it almost always points to the flapper or chain, not the fill valve. Jiggling lifts the flapper slightly and lets it re-seat in a slightly different position, temporarily stopping the leak. That's a reliable indicator the flapper isn't sealing consistently. If a brand-new flapper still leaks after a few weeks, check whether the plastic seat (the ring the flapper presses against) has mineral scale or cracks — a scored seat means water will work under even a perfect flapper. In that case you'd replace the flush valve seat, which is a bigger job, or consider replacing the whole flush valve assembly.
For a wider look at what can go wrong inside the tank, our toilet repair guides walk through each component in more detail.
When to Call a Plumber
Most running-toilet repairs are well within DIY range. That said, call a plumber if you find a cracked tank or bowl, if the shutoff valve itself won't fully close (you may need that valve replaced before you can do any tank work safely), or if after replacing both the flapper and fill valve the toilet still runs. A persistent run after new parts usually points to a flush valve seat issue or a less obvious internal problem that's worth a professional eye.
 Korky 2017BP Standard 2-Inch 2X Ultra High Performance Universal Long Lasting Rubber-Easy to Install-Made in USA Toilet Flapper, 1 Count (Pack of 1), Red
View on Amazon →
Korky 2017BP Standard 2-Inch 2X Ultra High Performance Universal Long Lasting Rubber-Easy to Install-Made in USA Toilet Flapper, 1 Count (Pack of 1), Red
View on Amazon →
 Toilet Flapper Chain, Stainless Steel Toilet Handle Chain, 2 Pack Toilet Flapper Chain Replacement Kit 9.45'' Universal Toilet Chain Toilet Flush Lift Chain Adjustable Length Fits Most Toilet Flappers
View on Amazon →
Toilet Flapper Chain, Stainless Steel Toilet Handle Chain, 2 Pack Toilet Flapper Chain Replacement Kit 9.45'' Universal Toilet Chain Toilet Flush Lift Chain Adjustable Length Fits Most Toilet Flappers
View on Amazon →
 Fluidmaster 400H-002 Performax Universal Toilet Fill Valve High Performance Tank and Bowl Water Control, 1-Pack, Multicolor
View on Amazon →
Fluidmaster 400H-002 Performax Universal Toilet Fill Valve High Performance Tank and Bowl Water Control, 1-Pack, Multicolor
View on Amazon →
 Toilet Fill Cycle Diverters overflow & Leak Detecting Dye-Tablets Tank Water Saver Pack, 2 Pack
View on Amazon →
Toilet Fill Cycle Diverters overflow & Leak Detecting Dye-Tablets Tank Water Saver Pack, 2 Pack
View on Amazon →

Still need help? Ask a Plumbing Expert AD
Get a personalized answer from a verified plumbing expert. Describe your issue and get step-by-step help.