
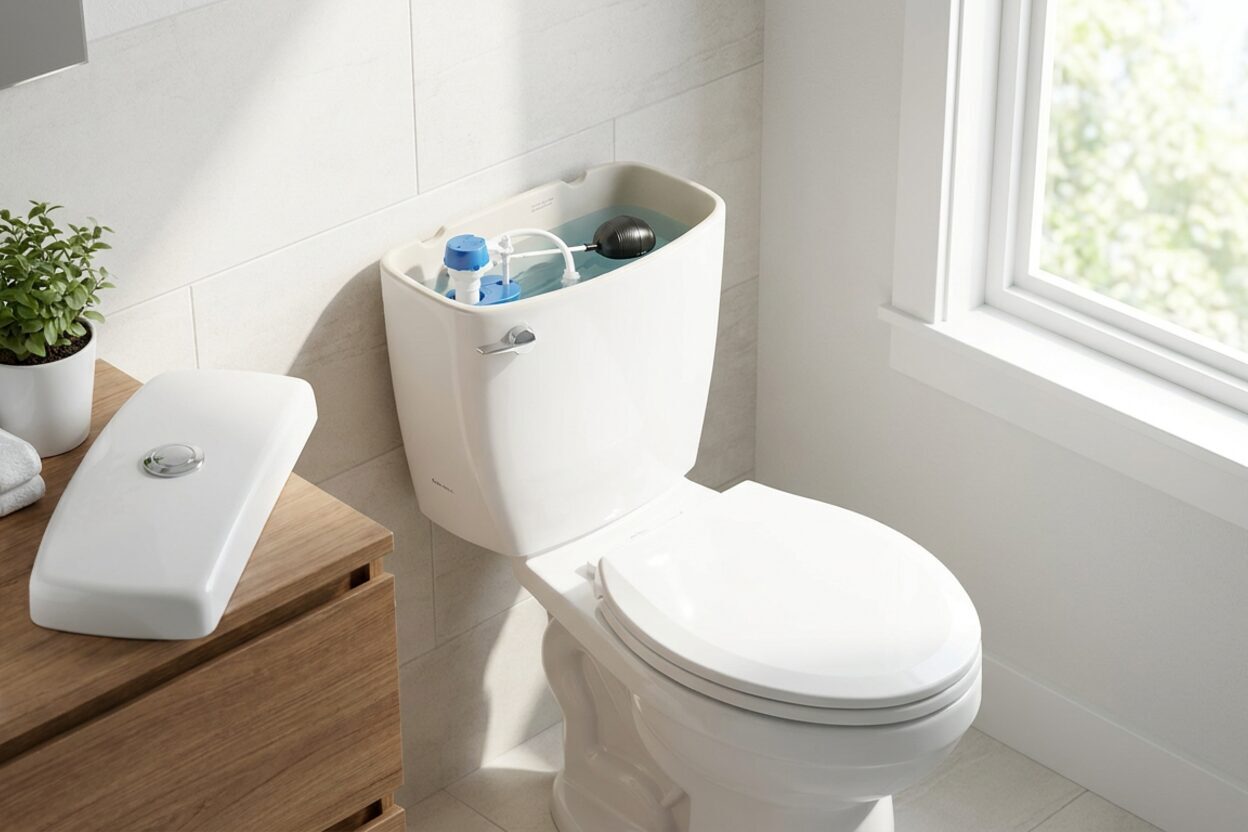
Why Does My Toilet Keep Filling With Water?

Why does my toilet keep refilling itself after heavy rain?
Read full question
Found myself staring at a toilet that won't stop cycling on and off after all that heavy rain we had last week — the tank fills up, I hear it click off, and then a few minutes later it kicks back on again like it's topping itself up. My house is older, probably original plumbing from the late 70s, so I wasn't sure if the wet weather had something to do with it or if something finally gave out inside the tank. It's been doing this around the clock, and I can hear it from the hallway at night.
I haven't touched the toilet at all, and nothing looks obviously broken when I lift the lid. The water level seems normal, but the fill valve just keeps cycling. Is this something I can sort out myself, or am I looking at a bigger problem?
Quick Answer
A toilet that keeps refilling on its own is almost always caused by a slow internal water leak — typically a worn flapper that lets water seep from the tank into the bowl, triggering the fill valve to top up. Less commonly, a faulty fill valve or a water level set too high is the culprit. The good news is that all three causes are DIY-friendly repairs using inexpensive parts.
The Symptom That Wakes You Up at 3 a.m.
That quiet hiss followed by the fill valve kicking on — over and over, all day and all night — is one of the most common toilet complaints around. Before anything else, I want to gently set aside the weather connection: rainfall doesn't directly cause a toilet to cycle. What's much more likely is that a component inside your tank was already wearing out, and the timing just happened to coincide with the storm. Old plumbing in a home from the 1970s is genuinely more prone to this, so the age is relevant — just not the rain.
The good news is that a continuously refilling toilet almost always has one of three causes, all of them fixable without calling a plumber.
What's Actually Happening Inside the Tank
Your toilet works on a simple loop: you flush, water drains from the tank into the bowl, and the fill valve refills the tank until a float signals it to stop. That cycle should happen once per flush and then go quiet. When the toilet keeps refilling on its own — what plumbers call a phantom flush or a running toilet — it means water is silently escaping from the tank into the bowl between flushes. The fill valve detects a drop in water level and compensates by running again. It's not broken in isolation; it's responding to a leak somewhere else in the system.
The Three Likely Culprits
- A worn or warped flapper. A worn or warped flapper is a very common culprit. The flapper is the rubber disc at the bottom of the tank that seals the flush valve opening. Over time — and the timeline varies considerably with water chemistry, the use of in-tank cleaners, and flush frequency — rubber degrades, warps, or accumulates mineral buildup, and the seal fails. Water trickles through continuously.
- Water level set too high. If the water level inside the tank rises above the top of the overflow tube, water constantly drains down that tube into the bowl. This is a water-level adjustment issue, not a parts failure, and it's the simplest fix of the three.
- A failing fill valve. Less common but possible, especially on older toilets. If the fill valve itself can't shut off cleanly, it may dribble water in continuously or fail to fully close.
Diagnosing Before You Buy Anything
Start with the dye test: drop a few drops of food coloring into the tank (not the bowl) and wait 10–15 minutes without flushing. If color appears in the bowl, your flapper isn't sealing and water is leaking through. This is the single most useful diagnostic step you can do.
Next, check the overflow tube. Remove the tank lid and look at the water level. The water surface should sit roughly an inch below the top of the overflow tube — check your fill valve or toilet manufacturer's instructions, as the recommended clearance can vary — the overflow tube being the open vertical tube in the center of the tank. If water is spilling into it or sitting right at the rim, that's your problem and it's an adjustment, not a replacement.
If the dye test is negative and the water level looks fine, the fill valve itself is the likely suspect. You can listen for a faint hiss near the fill valve even when the tank appears full — that's a sign it isn't shutting off properly.
The Fix: Working Through It in Order
Before touching anything inside the tank, shut off the water supply. The shutoff valve (angle stop) is on the wall or floor behind the toilet. Turn it clockwise until it stops, then flush to drain the tank. Use a sponge to mop up any residual water in the bottom of the tank before you start. If the shutoff valve won't close fully, the supply line is corroded or begins to leak when disturbed, or you find a crack in the tank or bowl, stop work and call a licensed plumber — these are not DIY repairs.
Replacing the Flapper
- Unhook the old flapper from the pegs on the sides of the flush valve and disconnect the chain from the flush handle arm.
- Take the old flapper to a hardware store or snap a photo of it and the toilet model. Flappers come in 2-inch and 3-inch sizes (and occasionally 4-inch for high-flow valves). Rather than guessing by age, measure the flush valve opening diameter or bring the old flapper to the hardware store — or check your toilet model number — to confirm the correct size.
- Snap the new flapper onto the flush valve pegs and reconnect the chain, leaving a small amount of slack — roughly half an inch as a starting point, though you may need to adjust. Too much slack and the flapper won't lift fully on a flush; too little and it can't seat properly and will allow a slow leak. Test a few flushes and fine-tune the chain length as needed.
- Turn the water back on, let the tank fill, and run the dye test again to confirm the seal.
Adjusting the Water Level
If water is running into the overflow tube, you need to lower the float. On a ball-float assembly (common on older toilets), bend the float arm gently downward or turn the adjustment screw at the valve. On a modern cup-float fill valve, there's typically a pinch clip or a twist-adjustment on the float cup itself — slide it down the shaft to lower the water level. Aim for about an inch of clearance below the top of the overflow tube (or the clearance specified by your fill valve or toilet manufacturer). Important: after any adjustment, check that the fill valve's critical-level (CL) mark — usually a stamped or printed label on the valve body — sits at least 1 inch above the top of the overflow tube. Only the water surface sits below the overflow-tube rim. If the CL mark falls below the overflow tube top, the valve is set too low and backflow protection is compromised; raise the valve or select a taller replacement.
Replacing the Fill Valve
If the fill valve is the problem, replacement fill valves are inexpensive and largely universal — most are adjustable to fit a wide range of tank heights. Turn off the supply, flush and sponge out the tank, disconnect the supply line at the bottom of the tank, unscrew the lock nut under the tank, and swap in the new valve following the manufacturer's instructions. This is a straightforward job even for a first-timer; our fill and flush valve repair guides walk through the steps in more detail if you want a deeper reference.
Preventing It From Coming Back
A few habits that extend the life of tank components: avoid in-tank bleach tablets or drop-in cleaners — they accelerate rubber degradation significantly. If your water is hard, a periodic wipe of the flapper seat with a cloth can remove mineral buildup that prevents a clean seal. And every year or two, it's worth a quick dye test just to catch a slow leak before it becomes a chronic one.
A running toilet wastes a surprising amount of water over time, so catching and fixing this promptly is genuinely worth the effort. In most cases, a new flapper is all it takes — a quick repair that brings a quiet house back in about 30 minutes.
 Fluidmaster 400H-002 Performax Universal Toilet Fill Valve High Performance Tank and Bowl Water Control, 1-Pack, Multicolor
View on Amazon →
Fluidmaster 400H-002 Performax Universal Toilet Fill Valve High Performance Tank and Bowl Water Control, 1-Pack, Multicolor
View on Amazon →
 Korky QuietFILL Platinum Toilet Fill Valve - Universal Fits 99% of Toilets - Easy Height Adjust for Fast Install, 528MP
View on Amazon →
Korky QuietFILL Platinum Toilet Fill Valve - Universal Fits 99% of Toilets - Easy Height Adjust for Fast Install, 528MP
View on Amazon →
 Toilet Fill Cycle Diverters overflow & Leak Detecting Dye-Tablets Tank Water Saver Pack, 2 Pack
View on Amazon →
Toilet Fill Cycle Diverters overflow & Leak Detecting Dye-Tablets Tank Water Saver Pack, 2 Pack
View on Amazon →
 Korky 2017BP Standard 2-Inch 2X Ultra High Performance Universal Long Lasting Rubber-Easy to Install-Made in USA Toilet Flapper, 1 Count (Pack of 1), Red
View on Amazon →
Korky 2017BP Standard 2-Inch 2X Ultra High Performance Universal Long Lasting Rubber-Easy to Install-Made in USA Toilet Flapper, 1 Count (Pack of 1), Red
View on Amazon →

Still need help? Ask a Plumbing Expert AD
Get a personalized answer from a verified plumbing expert. Describe your issue and get step-by-step help.